You notice the joint before you notice the driveway problem. After a hard Florida storm, the gap between concrete slabs may be holding water, growing weeds, or shedding strips of brittle sealant. The driveway can still look sound from the street, but water and repeated vehicle loads are already testing the slab edges.
That pattern is common across Marion County, FL, Citrus County, FL, and nearby communities such as Ocala, Dunnellon, Belleview, Inverness, and Crystal River. Concrete expansion joint repair isn't just a cosmetic refill. Done at the right time, it helps preserve movement capacity, limit moisture intrusion, and control the cost of future concrete work.
Table of Contents
- Why Florida Driveways Show Joint Failure Sooner Than Expected
- What Expansion Joints Actually Do in a Concrete Slab
- Inspecting the Joint Before You Touch a Sealant Gun
- Choosing the Right Sealant and Backer Rod for the Job
- Step-by-Step Repair From Old Sealant to New Cure
- Curing Time, Traffic Windows, and Routine Maintenance
- When to DIY, When to Call a Professional, and What It Costs
Why Florida Driveways Show Joint Failure Sooner Than Expected
A driveway in Central Florida has to handle heat, intense sunlight, sudden rain, and regular traffic without losing its ability to move. Concrete expands and contracts as temperatures change, while the sealant in the joint absorbs part of that movement. Over time, ultraviolet exposure can harden the sealant, and repeated wetting can weaken its bond to the concrete walls.
The first visible symptom is often adhesion loss. The sealant pulls away from one or both joint walls, leaving a narrow channel where water, sand, leaves, and seeds collect. A homeowner in Summerfield or The Villages may clean the gap repeatedly, but cleaning won't restore a sealant bead that has already separated from the slab.
Practical rule: A joint that holds water after rain deserves attention even when the surrounding concrete still looks intact.
Florida's afternoon thunderstorms create a particularly difficult maintenance cycle. Water enters failed joints, debris remains in the opening, and vehicle tires flex the slab edges as traffic crosses the gap. In areas around Homosassa, Silver Springs, and Hernando, trees and heavy seasonal debris can make the problem more persistent.
A sound joint lets adjacent slabs move independently. A failed joint allows moisture and debris to interfere with that movement, which can contribute to spalling, cracked edges, uneven surfaces, and trip hazards. The Federal Highway Administration has long treated joint maintenance as a pavement-preservation and cost-control measure. In one archival comparison, two states with similar conditions reported savings of approximately $16.00 per square yard when a joint repair strategy replaced a more expensive alternative, as documented in the FHWA report on concrete pavement joints.
For a new driveway, slab layout and joint detailing matter from the start. Riverside's discussion of concrete slab construction details provides useful context for why preparation and joint placement influence later maintenance. Whether the property is residential or commercial, early repair is usually more economical than waiting for the joint to damage the concrete around it.
What Expansion Joints Actually Do in a Concrete Slab
An expansion joint is a planned separation between concrete sections. It gives the slabs room to move instead of forcing that movement into random cracks. The joint commonly includes a compressible filler or backer material and a flexible sealant at the surface.
A control joint serves a different purpose. It creates a weakened plane that encourages shrinkage cracking to occur in a predictable line. An isolation joint separates a slab from a fixed element such as a wall, column, or curb. Homeowners often call all three “expansion joints,” but the repair method depends on what the joint was designed to do.
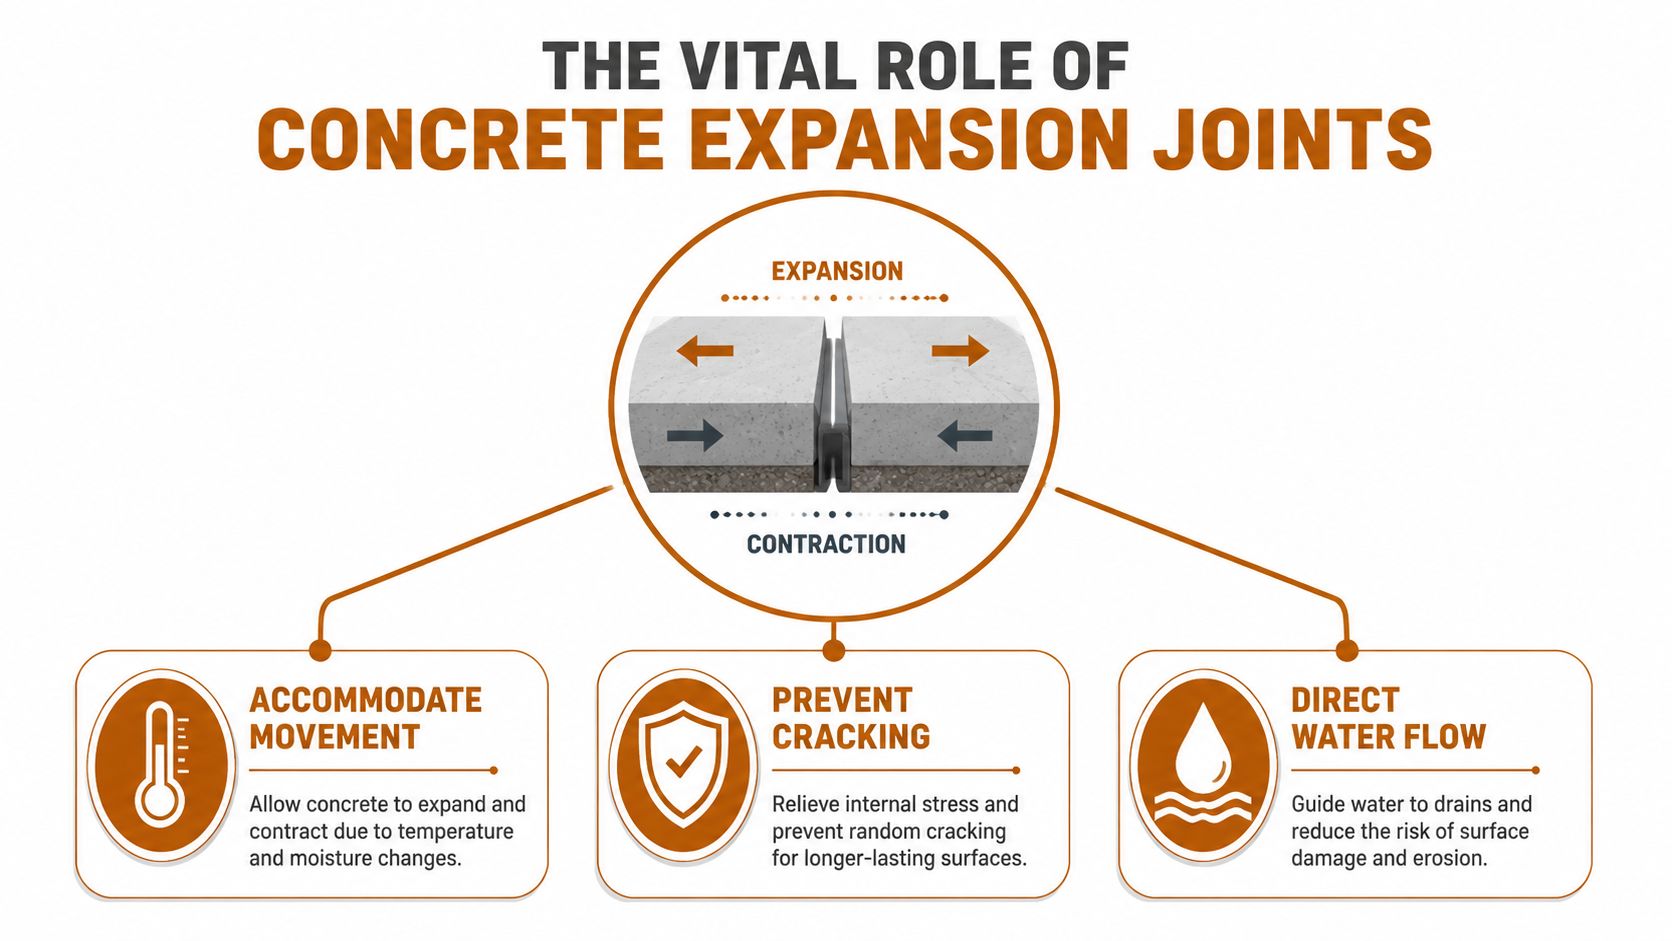
When the joint works correctly, it accommodates movement, blocks water and debris, and keeps slab edges from grinding directly against each other. When the sealant fails, the open space can fill with aggregate or organic material. That contamination reduces the room available for movement and concentrates stress at the edges.
Design intent matters during repair
A repair isn't successful merely because the opening looks full. The finished system must still compress, stretch, and bond as the slabs move. That means the installer needs to inspect the joint width, edge condition, filler material, and direction of movement before choosing a product.
Riverside's explanation of what a concrete expansion joint does can help homeowners distinguish a movement joint from an ordinary surface crack. On driveways in Dunnellon and surrounding Central Florida communities, that distinction prevents a common mistake, filling a working joint with rigid patch material.
The repair objective is simple: restore the joint's movement capability without trapping water or creating a new stress point. That starts with inspection, not with a sealant gun.
Inspecting the Joint Before You Touch a Sealant Gun
Start by inspecting the joint when the concrete is dry. Clear away leaves, loose sand, and surface dirt, then follow the entire opening from one end to the other. A gap near the garage may look severe while a less visible section has already lost its bond.
Check for missing sealant, hardened beads, torn edges, and material pulled away from the concrete. At several points, carefully test the existing bead with a utility knife. Crumbling, rigid, or easily detached material no longer provides dependable movement or adhesion.
Separate sealant failure from concrete failure
The condition of the joint edges determines whether a refill is worthwhile. Minor sealant deterioration with sound concrete edges can usually be handled with thorough cleaning and resealing. Spalled nosing, broken corners, or a vertical offset between slabs means the concrete needs attention before a new sealant can hold.
Inspect for weeds, trapped sand, oil, grease, and standing water. Measure the joint at several locations because older slabs rarely have perfectly uniform openings. A backer rod should fit snugly, without being forced into the joint or left loose enough to move or float.
The FHWA's joint-resealing evaluation identified adhesion loss and spall failure as dominant failure modes. The repair lesson is practical: remove failed material, clean the joint thoroughly, let it dry, and control where the sealant bonds. Applying a new bead over the old surface leaves those failure points in place. The FHWA technical brief on resealing concrete pavement joints documents that evaluation.
A separate FHWA study examined 56 joint-seal treatments and found wide variation in field performance. At sites with joints 5 to 7 years old, reported failure affected 19% to 58% of joint length. That range shows why surface preparation and seal geometry matter as much as the sealant itself, as reported in the FHWA joint-seal performance study.
| What You See | Likely Cause | Recommended Action |
|---|---|---|
| Brittle, missing, or separated sealant | Age, UV exposure, or adhesion loss | Remove failed material, clean, dry, and reseal |
| Weeds, sand, or water in the opening | Failed moisture and debris exclusion | Complete the clean-out before choosing sealant |
| Small chips along otherwise sound edges | Localized impact or wear | Rebuild loose spots before resealing |
| Broad spalling or broken nosing | Concrete edge failure | Evaluate partial reconstruction or replacement |
| Slabs at different heights | Settlement or base movement | Get a professional assessment before joint repair |
| Failure across more than a quarter of the joint length | Systemic seal failure | Complete a clean-out and reseal instead of spot patching |
In Central Florida, timing affects the result. Avoid the hottest part of a summer day, and do not seal a damp joint after rain or overnight humidity. Many products have defined application ranges. One product guidance example specifies surface and air temperatures between 40°F and 90°F, with the sealant ideally between 60°F and 80°F. A mild, dry spring or early-fall day gives the repair a wider margin for proper bonding and cure.
Choosing the Right Sealant and Backer Rod for the Job
A Central Florida driveway can look dry at sunrise and still hold moisture in the joint by midmorning. Choose the sealant for the joint's movement, exposure, slope, width, and surface condition, not just for the product's color or price. Horizontal and vertical joints also require different handling.
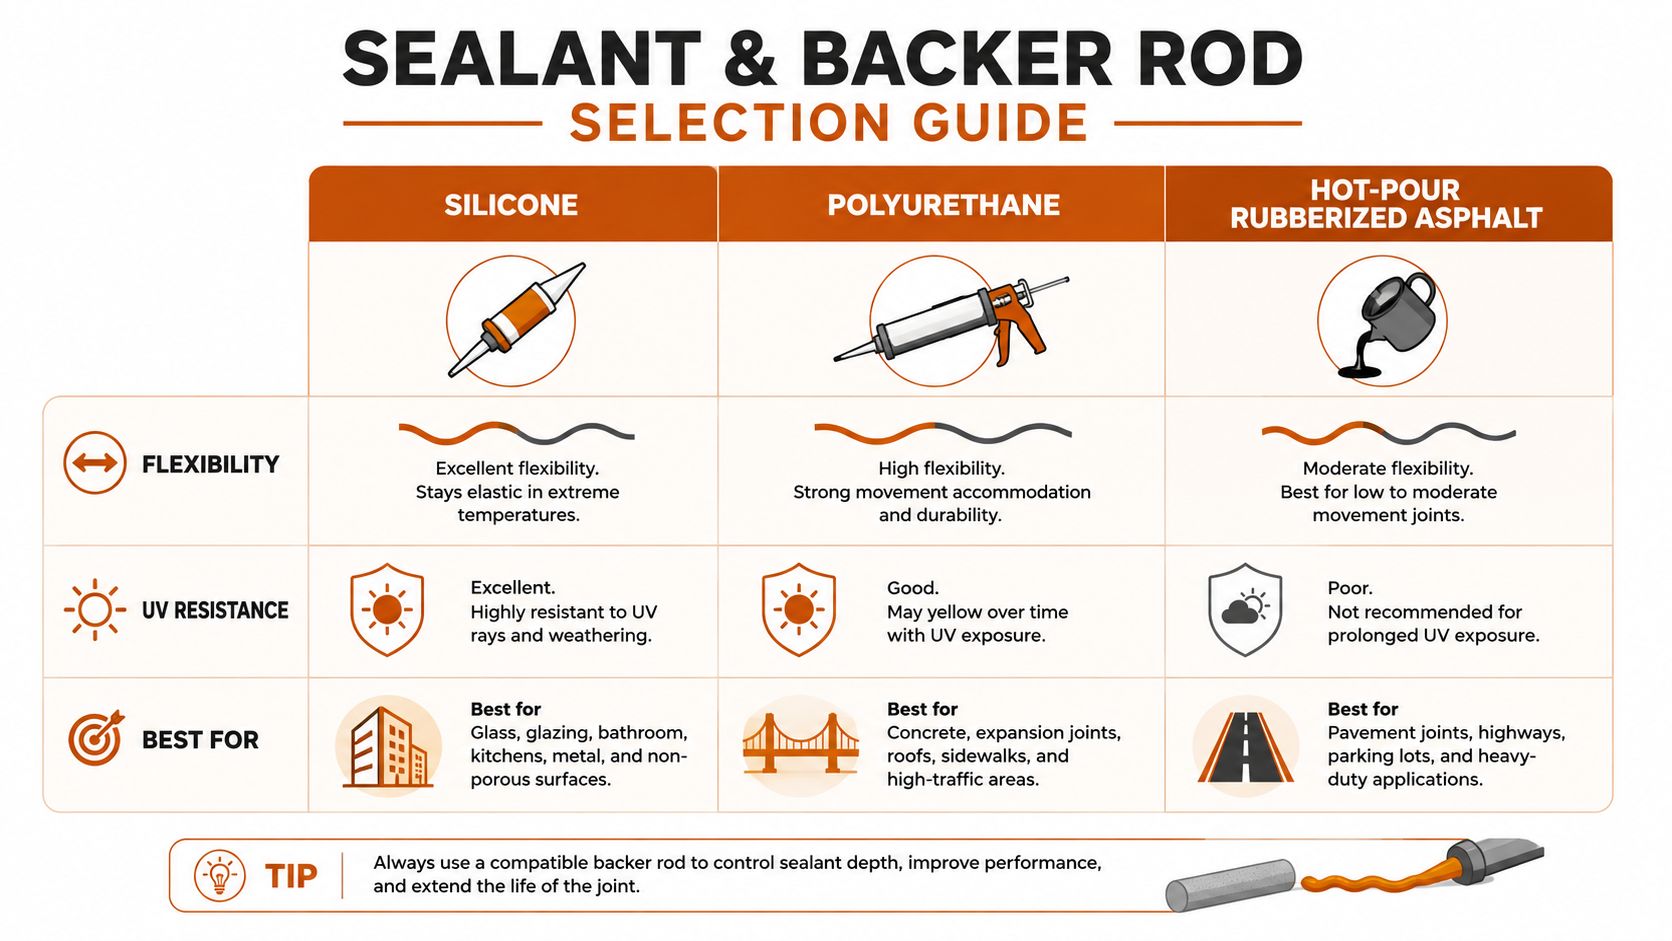
Hot-pour rubberized asphalt suits horizontal pavement joints when heating equipment and temperature control are available. It can work across larger pavement areas, but it is rarely a casual driveway product. Overheating, contamination, or poor placement can produce a weak bond that opens during the next cycle of heat and rain.
Self-leveling silicone flows into a prepared horizontal joint and performs well when the reservoir is correctly sized and the concrete is clean and dry. On a sloped driveway edge, it can run before it sets. Non-sag silicone stays in place on slopes, curbs, vertical faces, and transitions. It takes more tooling, but that extra control prevents a flowing bead from draining out of the repair.
Polyurethane and polysulfide can handle joint movement when their technical data sheets approve the substrate and exposure. In Florida humidity, verify the moisture limits and application conditions before opening the cartridge. A product that bonds well on a dry test area can still fail if installed over damp concrete.
Movement class changes the geometry
Joint width must allow the sealant to absorb the movement expected at that location. The FHWA sealant-reservoir guidance gives a practical example: with expected movement of 0.25 inches and 50% extensibility, the joint should be at least 0.50 inches wide.
Movement class describes the change in joint width the sealant can accommodate. A Class 100/50 sealant permits a 100% increase and a 50% decrease in width. Many polyurethane and polysulfide products fall into Class 25, so the joint should be at least four times wider than the expected movement, according to the ICRI movement-class reference.
Match the backer rod to the exposure
Backer rod sets sealant depth and prevents three-sided adhesion. Closed-cell foam is the practical exterior choice where water may enter. Open-cell foam fits dry interior applications only when the selected sealant system permits it.
For exterior joints, the sealant profile commonly follows a 2:1 depth-to-width ratio, with practical sealant depth between 1/4 inch and 1/2 inch, as outlined in the FHWA sealant-reservoir guidance. Wider joints still need the product data sheet to confirm the allowable depth and width.
Field-molded sealants generally need a minimum joint width of 1/4 inch. Joints narrower than 6 mm do not suit typical silicone sealants because they provide too little room for movement, according to the concrete joint seal guidance. If the opening is narrow, crumbling, or stays wet after a dry morning, refilling it is usually wasted effort. A properly sized, clean joint can extend slab life through another Florida summer.
Step-by-Step Repair From Old Sealant to New Cure
A Florida driveway can look ready for sealing in the morning and become too hot to work by midday. Good concrete expansion joint repair starts with preparation, clean timing, and a sealant profile that can move with the slabs. If old material stays bonded to the joint walls, the new bead may adhere to a weak layer and fail within a season.
Remove the failed material carefully
Use a joint saw, oscillating tool, hooked blade, or router suited to the existing filler. Cut along the joint walls instead of prying against the slab noses. Remove failed sealant, loose backer material, and contaminated residue without breaking sound concrete.
Vacuum the opening, then use clean compressed air to clear fine dust. Inspect for oil, grease, mud, and moisture. A pressure washer can remove heavy contamination, but Central Florida humidity means the joint may need more drying time than the slab surface suggests. Seal only after the walls and base are visibly dry.
Set the backer rod at the correct depth
Choose a backer rod slightly wider than the opening so it remains compressed against both walls. Press it down with a blunt tool. A sharp screwdriver can puncture the foam or damage the concrete edge.
The rod controls sealant depth and prevents the material from bonding across the bottom of the joint. Set it too shallow, and tires may catch a proud bead. Set it too deep, and the thin sealant layer may not tolerate slab movement. Follow the product instructions and keep the exterior profile near a 2:1 depth-to-width ratio, consistent with the earlier joint-sealing guidance.
Apply and tool the sealant
Mask both sides when the finished edge matters. Use primer only if the manufacturer specifies it, and use the approved primer rather than a general concrete coating.
Place self-leveling sealant in a level horizontal joint. Choose non-sag material on a slope or vertical surface. On a Florida driveway, work during the cooler morning hours, before the slab becomes excessively hot. Do not apply material when rain is forecast within 24 hours. Heat can make self-leveling sealant flow unevenly and skin over before it bonds properly.
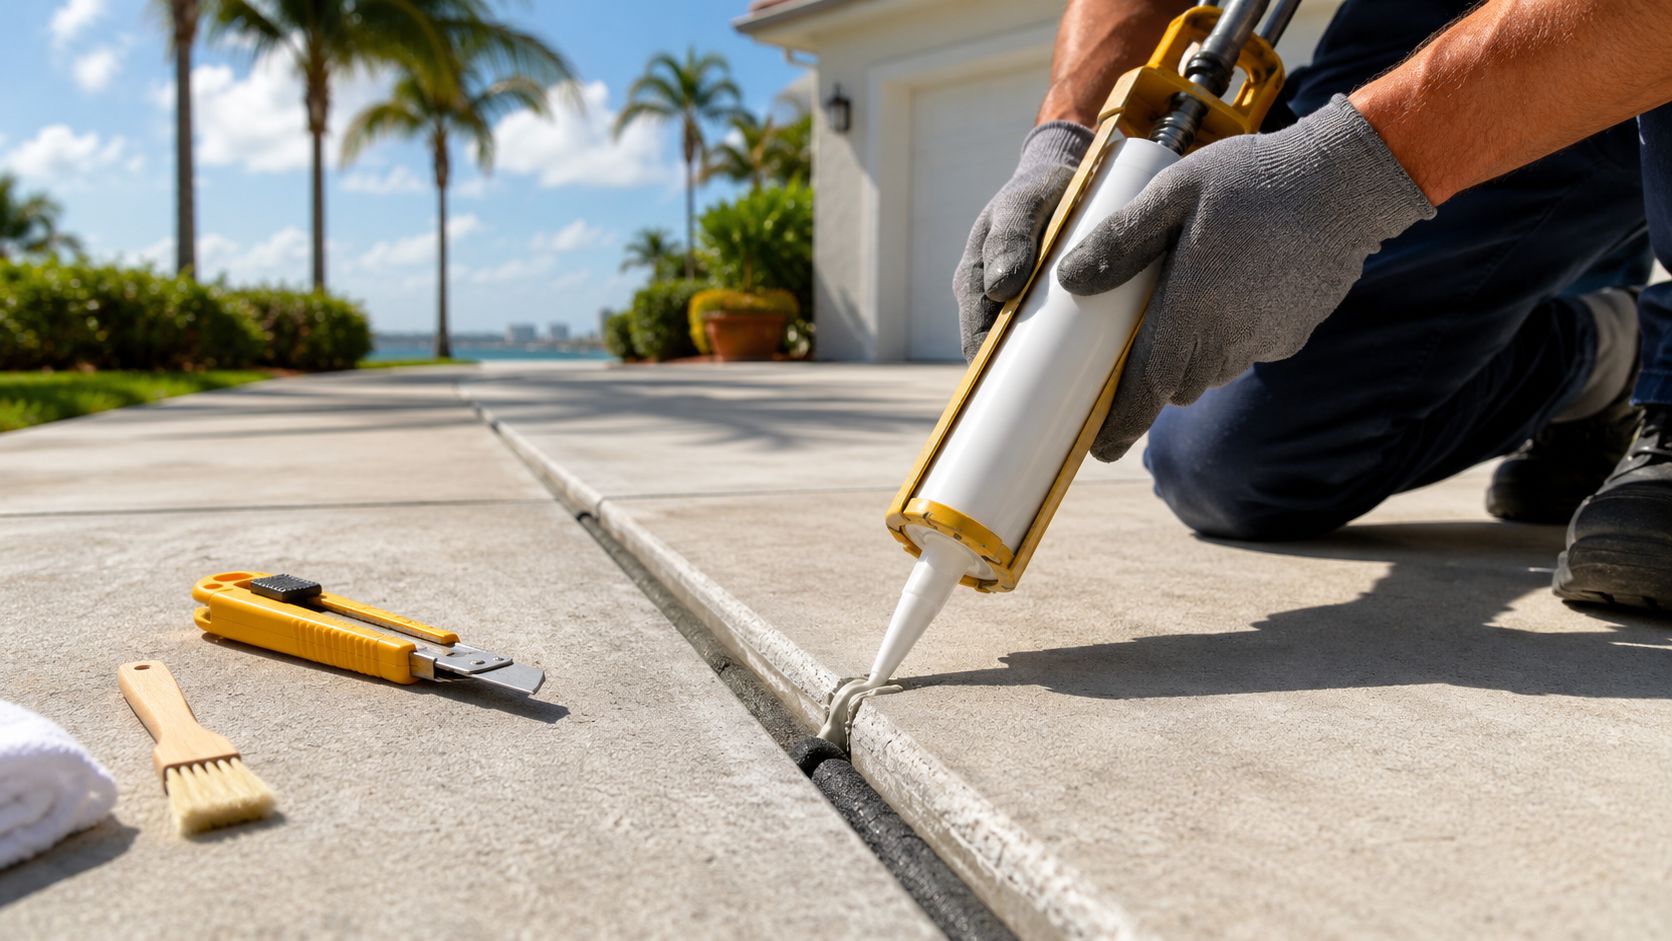
Tool the bead into continuous contact with both walls, leaving a smooth concave or hourglass profile. Remove bubbles, gaps, and smears from the slab, then pull the masking before the sealant skins over. Keep vehicles and foot traffic off the repair until the manufacturer's cure requirements allow use.
Curing Time, Traffic Windows, and Routine Maintenance
A joint may look finished while the sealant underneath is still vulnerable. Tires, carts, and foot traffic can deform an uncured bead, pull it from the concrete walls, or grind dirt into its surface. In Central Florida, direct sun can heat the slab quickly, while humidity and evening moisture can slow the cure.
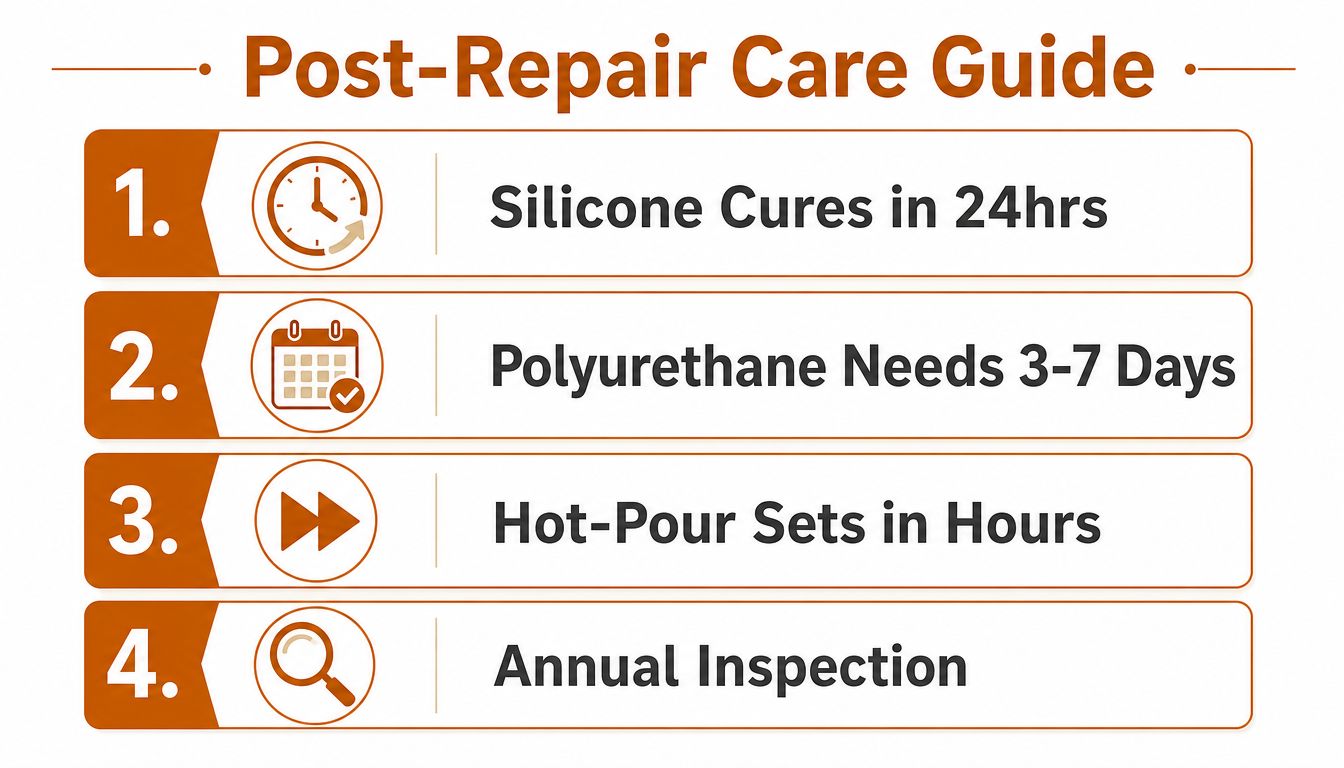
Cure time depends on the sealant family, bead geometry, temperature, humidity, and ventilation. Silicone may cure relatively quickly, polyurethane often needs a longer protected period, and hot-pour material can set sooner when installed correctly. These are general tendencies, not a replacement for the product technical data sheet. Use the manufacturer's stated traffic window, even if the surface feels dry.
A cool Florida winter morning may cure more slowly than a warm spring afternoon. That difference matters at an HOA entrance, church lot, retail driveway, or commercial access lane, where closing the area requires coordination. Schedule the repair for a dry weather window and keep traffic off until the specified cure period has passed.
Keep the repaired joint clear
Inspect sealed gaps every six months to a year, and clear debris during routine checks. Around Inverness, Homosassa, and The Villages, leaves, mulch, sand, and storm debris can collect in movement joints and hold moisture against the sealant.
After a named storm, check for sticks, standing water, fresh edge damage, or sand beneath the bead. Watch for these warning signs:
- New separation: The bead has pulled away from one or both concrete walls.
- Tearing or splitting: The sealant can no longer accommodate joint movement.
- Debris intrusion: Sand and organic matter are entering beneath the bead.
- Recurring water: The joint stays wet or holds water after normal drainage.
- Growing spalls: The slab nosing continues breaking after resealing.
For broader concrete questions, Riverside explains how long concrete takes to cure. Joint sealant requirements still come from the selected manufacturer. If the joint repeatedly opens, holds water, or damages its concrete edges, another refill is unlikely to extend slab life.
When to DIY, When to Call a Professional, and What It Costs
A homeowner can reasonably handle a small, accessible driveway joint when the concrete edges are sound, the joint is easy to clean, and the repair involves a limited section. The work still requires the right tools, dry conditions, careful sizing, and patience. A quick bead laid over dirt isn't a repair strategy.
A contractor should evaluate the joint when the slab edges are badly spalled, the nosing is broken, or the slabs sit at different heights. The same applies when the joint has lost its original movement capacity. In those situations, resealing alone may fail because the sealant has no stable edge or adequate geometry to work against.
The false economy of a surface refill
The FHWA lifecycle-cost perspective is useful here. Joint repair is intended to delay larger rehabilitation, not to disguise structural damage. If the concrete around the joint needs rebuilding, spending on repeated surface refills can postpone the necessary work while allowing moisture and traffic to worsen the slab.
Florida International University research describes full replacement as necessary when the concrete or steel extrusion fails. That study gives planning benchmarks of about 25 years for systems using A36 steel extrusions and about 30 years for systems using PCC, while also emphasizing that material degradation and inspection influence the timing, as documented in the FIU expansion-joint repair and replacement study.

Riverside Sealing & Striping, LLC serves Marion County, FL and Citrus County, FL, along with Ocala, Dunnellon, Belleview, Summerfield, Crystal River, Lecanto, Beverly Hills, Hernando, and The Villages. The company handles concrete repairs and replacement, new slabs, patios, sidewalks, asphalt sealcoating, and parking lot striping, with licensed and insured crews, reliable scheduling, local Central Florida experience, and free on-site estimates from 7am to 7pm.
A professional evaluation is especially useful when joint failure appears across a driveway, parking structure, HOA common area, or commercial pavement. The right recommendation may be a reseal, a localized edge rebuild, or replacement. The important decision is to match the repair to the condition rather than paying for the same failed refill repeatedly.
Riverside Sealing & Striping, LLC can inspect failed concrete expansion joints, explain whether resealing or concrete repair makes sense, and provide a free, no-pressure on-site estimate. For dependable concrete and asphalt work across Marion and Citrus counties, visit Riverside Sealing & Striping, LLC to schedule a professional evaluation.