
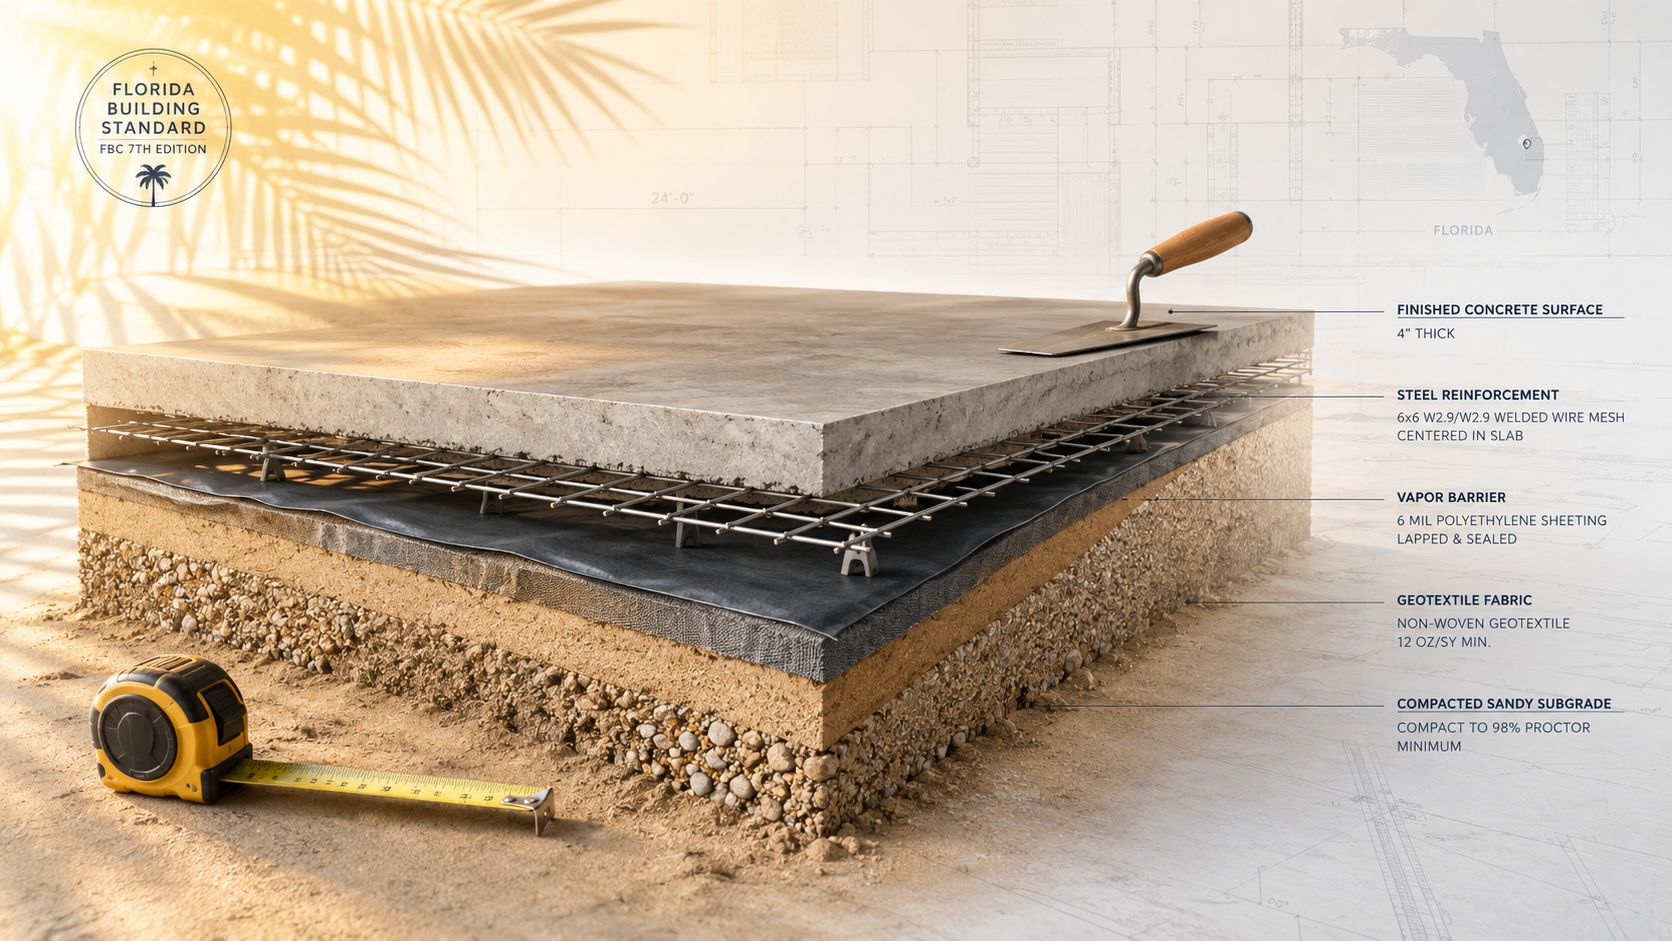
You can tell when a slab was built right in Dunnellon, Ocala, or Crystal River because it stops looking like a simple pour and starts acting like part of the property. The driveway stays tight at the edges, the patio doesn't pitch water back toward the house, and the joints crack where they were supposed to, not wherever the sun and soil decided to fight back. In Marion County, FL, and Citrus County, FL, that kind of result comes from the concrete slab construction detail, not from the truck that showed up on pour day.
The part most homeowners never see is the part that decides whether the slab lasts. Subgrade prep, forms, thickness, reinforcement, moisture control, joints, finish, and curing all have to work together, especially across Central Florida where sandy soils, sudden rain, and high humidity can expose weak detailing fast. If you're planning a new driveway in Belleview, a patio in Summerfield, or a replacement slab in Homosassa, the details below are the difference between a clean install and a repair call a few seasons later.
Table of Contents
- What a Concrete Slab Construction Detail Covers
- Site Preparation and Subgrade Requirements
- Formwork and Recommended Slab Thickness by Use
- Reinforcement Layouts for Crack Control and Load Transfer
- Vapor Barriers and Drainage in Central Florida
- Joint Types, Spacing, and Saw-Cut Timing
- Edges, Corners, and Non-Rectangular Slab Details
- Finishing and Curing for Florida Heat
- Inspection and Quality Assurance Checklist
- When to Call a Professional Concrete Contractor in Central Florida
- Frequently Asked Questions About Concrete Slab Construction
What a Concrete Slab Construction Detail Covers
A homeowner usually notices the pour. On a job site, the work starts before the truck shows up. A concrete slab construction detail is the full working plan for the soil, forms, slab thickness, reinforcement, moisture control, joints, finish, and curing, all tied together so the slab can perform as intended.
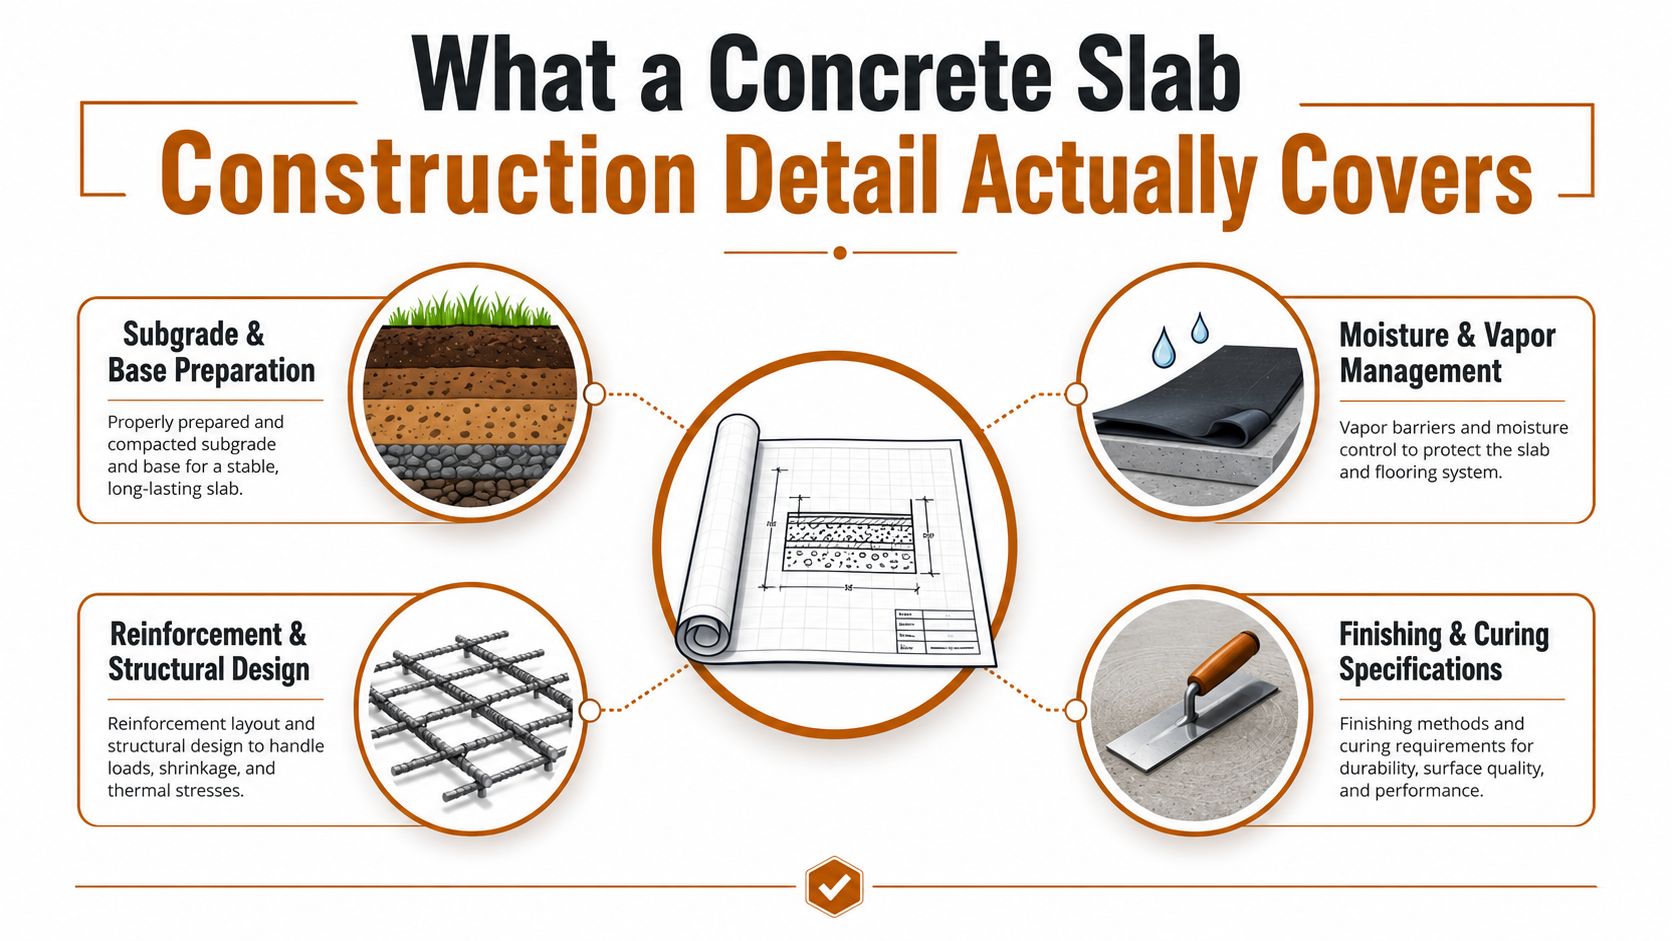
I've seen plenty of Florida homeowners stand at the end of a driveway and assume the job is finished once the concrete truck pulls away. That view misses the parts that decide whether the slab holds up. If the subgrade was never compacted right, if the forms flexed, or if the joints and curing were rushed to beat the heat, the slab will show it later with cracks, edge settlement, or a surface that turns dusty and weak.
Practical rule: the slab is a system, and the detail is the agreement between the contractor and the ground underneath it.
ACI guidance treats slab-on-ground design as a set of connected decisions, not a single thickness note on a sketch, and it calls for construction documents to identify the design criteria, base and subbase requirements, thickness, strength, reinforcement, joints, finish, tolerances, curing, and QA/QC items. That matters in places like Ocala, Inverness, and The Villages, where one lot can drain and settle very differently from the next. ACI 3021R-04 Chapter 3 on slab-on-ground design and ACI construction document requirements for slab details point to the same reality, the slab performs only as well as the plan behind it.
Central Florida adds its own pressure points. High water tables, sandy soils, hard rain, and strong sun can change how a slab should be supported, tied together, drained, and cured, which is why the early prep work matters so much. For a broader look at what goes into preparing the ground, see this guide to how to prepare ground for a concrete slab.
The rest of the build follows that sequence. Site prep sets the support, forms establish the shape, reinforcement helps control cracking and transfer load, drainage protects the edges, and curing decides whether the surface hardens into a durable slab or one that breaks down too soon.
Site Preparation and Subgrade Requirements
The ground under the slab is the essential component that bears the load. If that support is uneven, wet, or full of organics, the concrete inherits the problem even when the pour itself looks perfect. ACI's slab guidance treats the subgrade and base as part of the slab system because uniform support controls curling, cracking, and load transfer, and that matters just as much in Marion County, FL, as it does in Citrus County, FL. ACI slab-on-ground guidance
What good prep looks like on the ground
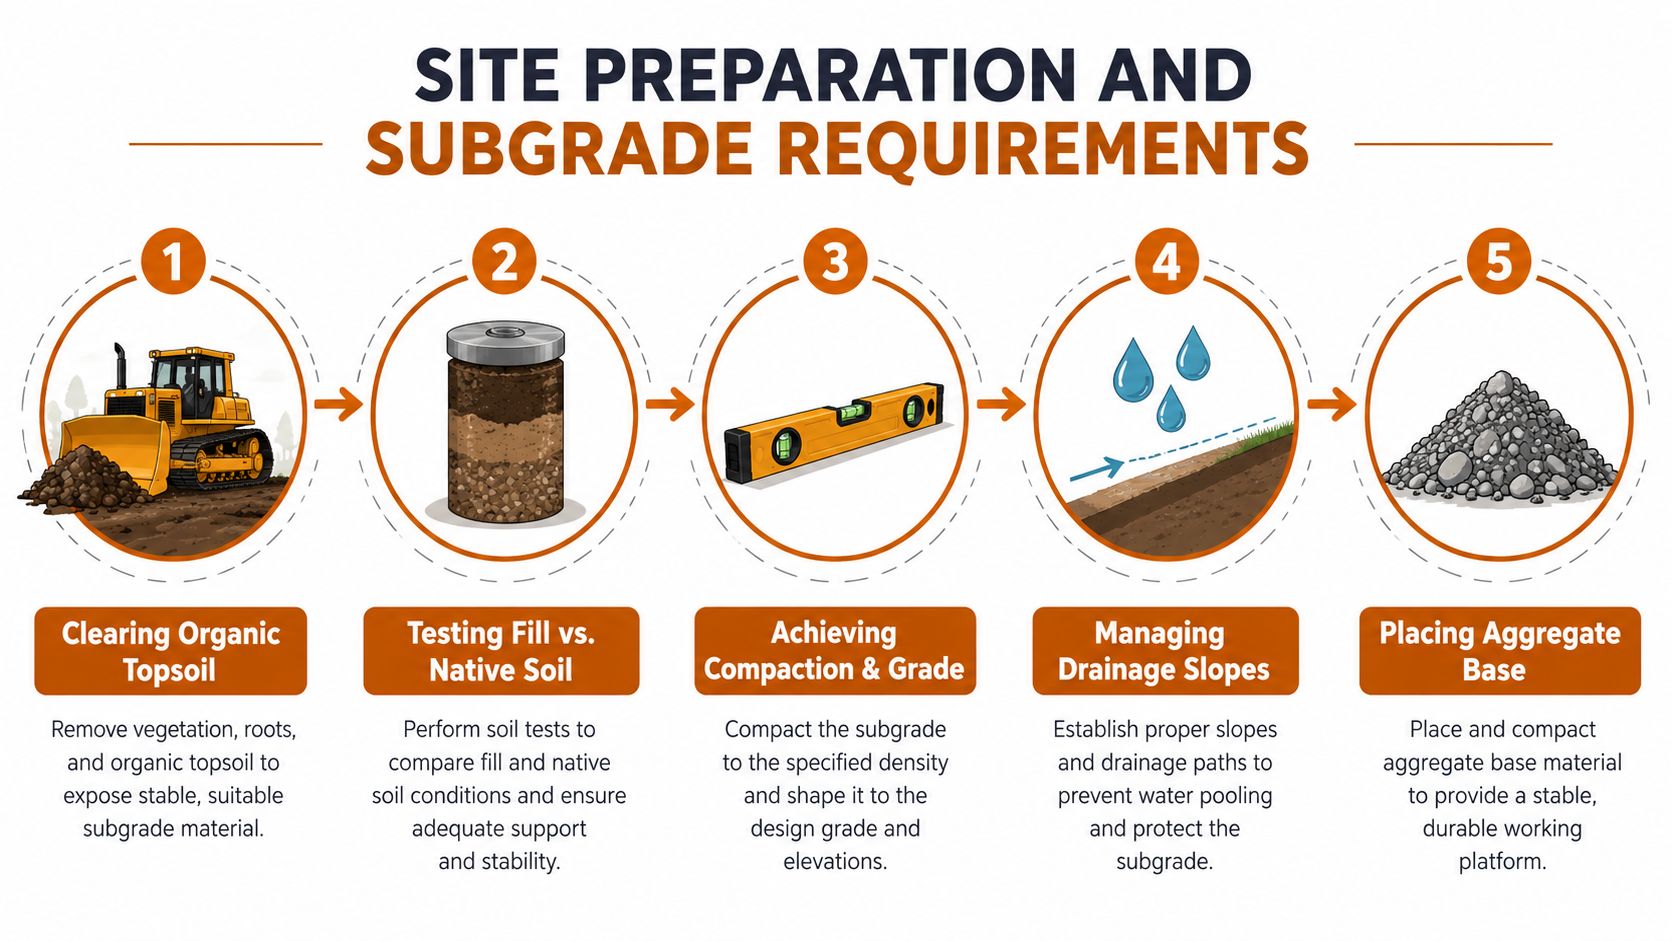
The first pass is stripping organic topsoil and any soft fill that will keep moving. Then the crew needs to identify where the native soil ends and imported fill begins, because those layers can behave differently under load. In sandy ground around Belleview, Dunnellon, and Hernando, the soil may drain fast, but it still has to be compacted in lifts or it can pump and settle under repeated traffic.
A stable pad should feel firm under equipment, not spongy or crusty on top with loose material beneath. If a project calls for a geotechnical review, that's usually worth the money when the slab will carry a garage load, a commercial edge, or anything tied to a structure. The ground needs to support the slab evenly before formwork goes in, not after the concrete has already locked the mistake in place.
Why drainage and compaction matter here
Florida rain changes the game. A site can look dry in the morning and hold moisture in the subgrade by afternoon, especially after a storm or when the water table runs high. That's one reason contractors should compact carefully and confirm grade before they ever move to forms or steel.
If you're trying to judge the crew on your own property, watch for these signs:
- Cleared organics first. Grass, roots, and dark topsoil should be removed before base work starts.
- Uniform lift compaction. The subgrade shouldn't be built in loose, thick dumps.
- Consistent slope. Water should have a path away from the slab area, not toward it.
- Stable base material. Aggregate should sit tight and even, not rutted or soft.
- No rushed form setting. Forms shouldn't be installed on a pad that still feels unsettled.
A practical starting point for ground prep is covered in this guide to how to prepare ground for concrete slab, and it lines up with what good slab work looks like in the field. If the base isn't right, everything above it starts at a disadvantage.
Formwork and Recommended Slab Thickness by Use
Thickness should follow the use, not habit. A patio in Silver Springs doesn't need the same build as a driveway in Ocala, and a garage slab doesn't belong in the same category as a small shed pad. The slab detail should match the load path, the expected traffic, and the edge condition, because thickness by itself doesn't rescue weak support or poor reinforcement.
Matching thickness to the job
A clean form line matters because the edge form is the reference plane for the whole finish. If the forms wander, the slab edge wanders with them, and that shows up later as ponding, uneven transitions, or a driveway that feels wrong every time you walk it. For residential work, straight, braced forms do more than hold shape, they give the finisher something trustworthy to work from.
| Use Case | Thickness | Edge Detail | Reinforcement Note |
|---|---|---|---|
| Patio | 4 inches | Clean square edge or slight bevel | Light reinforcement for crack control |
| Shed pad | 4 inches | Straight, compacted perimeter | Reinforcement based on point loads and storage weight |
| Standard driveway | 5 inches | Strong edge form with good bracing | Reinforcement suited to vehicle traffic |
| Heavy driveway or RV pad | 6 inches | Reinforced edge and careful base support | Stronger reinforcement and tighter joint planning |
| Garage slab | 5 to 6 inches | Controlled transitions at the opening | Detail around door loads and slab edges |
| Light commercial slab | Project-specific | Edge and joint plan tied to loads | Structural coordination required |
That table is the useful way to think about it. A thicker slab without proper base support is just more concrete over the same problem. A thinner slab on a solid, well-prepped base with the right reinforcement can outperform a bigger pour that was never detailed correctly.
For a deeper look at how the steel and slab work together, this overview of what is reinforced concrete slab helps explain why thickness alone isn't the answer. A slab designed for a driveway in Crystal River or a garage in Lecanto has to be built for the traffic it will see, not the traffic someone hopes it might never get.
Reinforcement Layouts for Crack Control and Load Transfer
Reinforcement gets talked about like it's one thing, but it isn't. Welded wire mesh, rebar grids, macro-synthetic fibers, and steel fibers all behave differently, and the job of the slab detail is to pick the right one for the problem. Some products help control crack width. Others help with structural capacity and load transfer. Those are related, but they're not the same.
What each reinforcement type really does
Mesh is commonly used in residential slabs, but it has to stay in the right place to matter. Rebar brings more deliberate structure to the slab, especially where the loads are more serious or where the edge needs help. Fibers can improve distribution of micro-cracks, but they don't replace a thoughtful layout when the slab has joints, corners, or openings that will concentrate stress.
A reinforcement detail that looks good on paper can fail on site if the steel ends up on the ground instead of in the slab.
The common field mistake is pulling welded wire mesh up during the pour and leaving it floating in the wrong spot. That defeats the purpose. Chairs, supports, and lap placement matter because reinforcement has to stay in the designed position while the concrete is placed and consolidated.
Joints and reinforcement have to cooperate
Doweled joints belong where the slab needs load transfer across a construction joint. Isolation joints need a compressible filler so the slab can move without binding to a column, wall, or fixed element. That's the difference between a slab that can move as planned and one that starts tearing itself apart at the restraint points.
If you're comparing options for a driveway in Summerfield or a patio in Beverly Hills, think about the crack-control goal first, then the budget. The budget should fit the detail, not replace it. For another practical reference, the page on reinforced concrete slab helps frame the difference between holding cracks together and carrying load.
Vapor Barriers and Drainage in Central Florida
Moisture is a silent problem under slabs in Florida. You don't always see it during the pour, but you'll see it later if the slab was detailed badly. That's why vapor control under the slab and drainage around the slab edge have to be treated as separate issues, even though they work together.
Where the barrier belongs
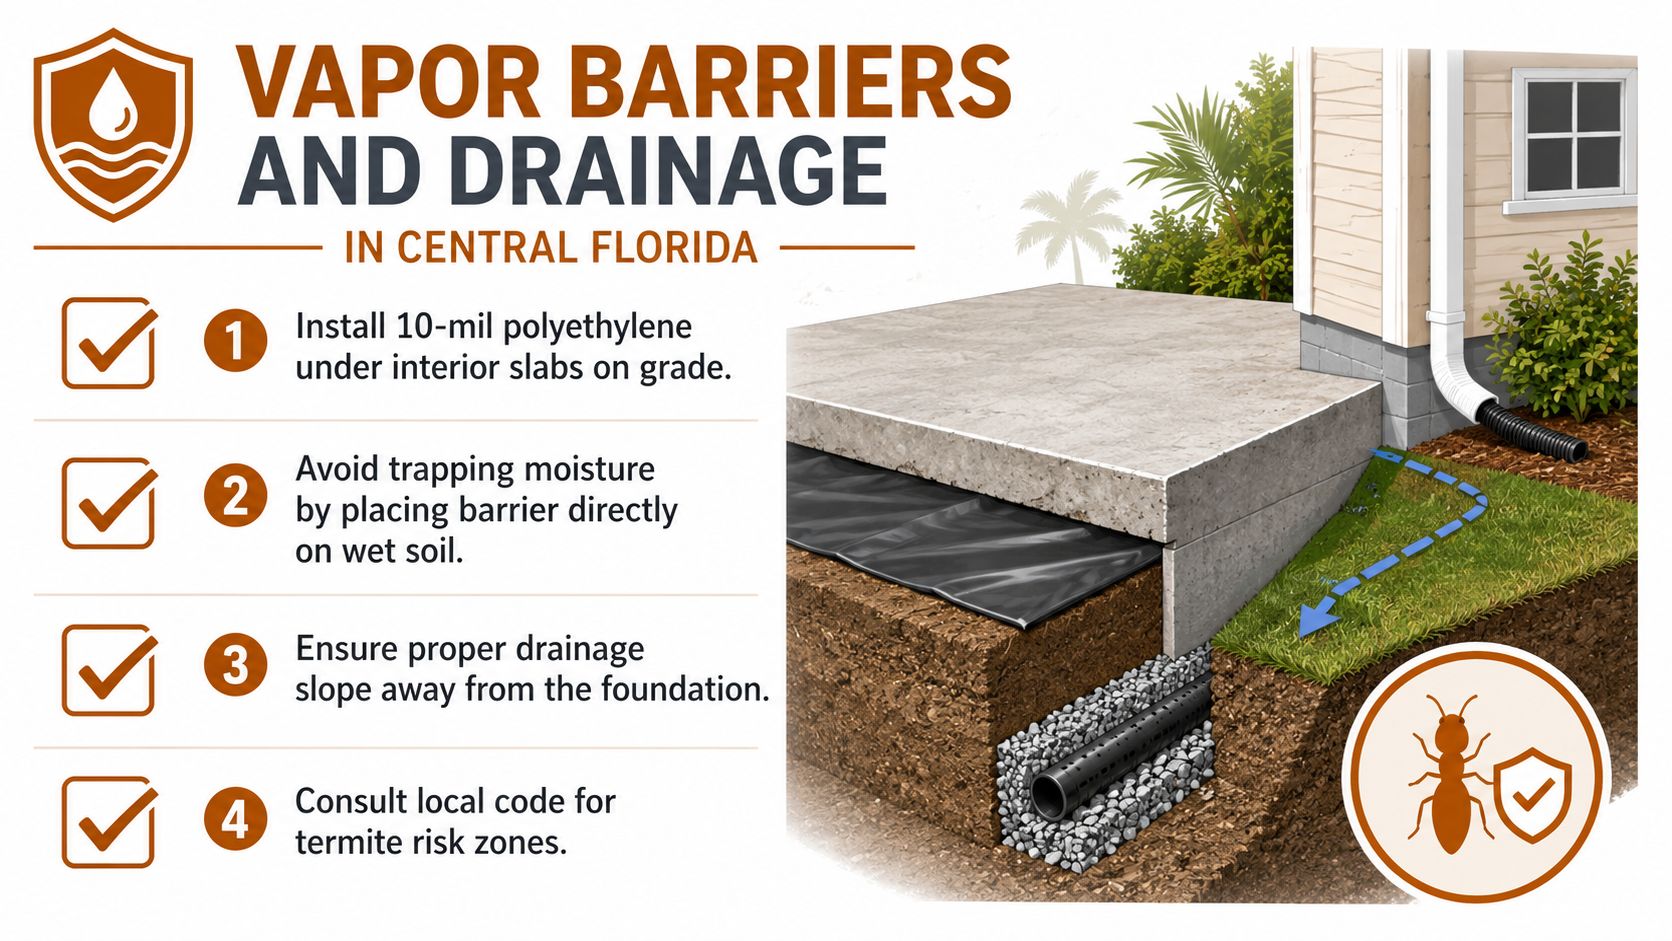
A 10-mil polyethylene vapor barrier is most useful under interior slabs on grade where moisture control matters for the finish floor and the space above it. The trap is placing barrier directly against wet soil with no proper base or blotter layer, because that can create problems during placement and doesn't give the slab a stable working surface. Florida's high water table can keep feeding moisture upward if the slab detail ignores that path.
Why the outside grading matters just as much
Outside the slab, the priority changes to drainage. Water needs to move away from the slab at a positive slope, and a practical rule of thumb is 2 percent away from the foundation. Gutters, downspouts, and swales matter because roof water dumped at the edge can erode the base and undermine one side of the slab before the homeowner realizes what happened.
A slab can look perfect for a year and still fail at one edge if downspouts discharge too close to the forms. I've seen that happen in places like Homosassa and Inverness, where the problem wasn't concrete quality at all, it was water management after the job was finished.
Joint Types, Spacing, and Saw-Cut Timing
Joints are where a slab is allowed to move on purpose. When the joint plan is right, cracks show up in controlled locations. When it's wrong, the slab cracks wherever it wants, which is usually the worst place for the eye and the load.
The four joint types that matter
Control joints create a planned weak line so shrinkage cracking has somewhere to go. Construction joints mark where one pour ends and another begins. Expansion joints separate parts of the slab that need room to move. Isolation joints keep the slab from locking to columns, footings, walls, or other fixed objects.
Best-practice guidance for slab-on-grade work recommends control-joint saw cuts at a depth of at least one-quarter of slab thickness, and common spacing for a 4-inch residential slab is about 10 to 15 feet. Other guidance notes that joints are often placed at roughly 2 to 3 times slab thickness in feet. Joint guidance for slab-on-grade work
Practical rule: in Florida heat, saw cutting has to happen while the concrete is still willing to release a clean line, not after the slab has already fought back.
Reading spacing against thickness
| Slab Thickness | Joint Depth | Max Spacing 2x Rule | Max Spacing 3x Rule |
|---|---|---|---|
| 4 inches | 1 inch minimum | 8 feet | 12 feet |
| 5 inches | 1.25 inches minimum | 10 feet | 15 feet |
| 6 inches | 1.5 inches minimum | 12 feet | 18 feet |
Those spacing figures help a homeowner read a plan and ask better questions. If the layout ignores the slab shape, traffic path, or nearby fixed elements, the spacing may look neat and still be wrong. Joint layout and reinforcement have to work together, not compete with each other.
Edges, Corners, and Non-Rectangular Slab Details
Most cracks that frustrate homeowners don't start in the middle of a nice square panel. They start at corners, cutouts, and odd angles where the stress stacks up. That's why a slab with a good thickness and a standard mesh layout can still fail if the shape itself wasn't detailed with respect.
Why odd shapes crack first
Re-entrant corners concentrate stress, and acute angles are especially crack-prone. The cleaner approach is to keep intersecting joint lines at 90 degrees where possible so the slab isn't forced to turn a crack around a sharp angle. When joints converge at a corner, special corner reinforcement, including L-shaped #4 bars, can help stabilize the area.
A driveway apron that wraps around a planter bed in Crystal River, a patio cut around a fire pit in Ocala, or a sidewalk that meets a porch at an angle in The Villages all need their own corner logic. The usual mesh alone isn't enough to solve that geometry. The detail has to tell the crew where the stress will show up.
What to ask for on the drawing
If the panel shape is irregular, the drawing should show the corner treatment instead of assuming the field reinforcement will handle it. That one decision often separates a slab that stays quiet from one that starts cracking at the same point every season. For homeowners in Dunnellon or Hernando, this is one of the easiest places to insist on a more thoughtful plan before the pour starts.
Finishing and Curing for Florida Heat
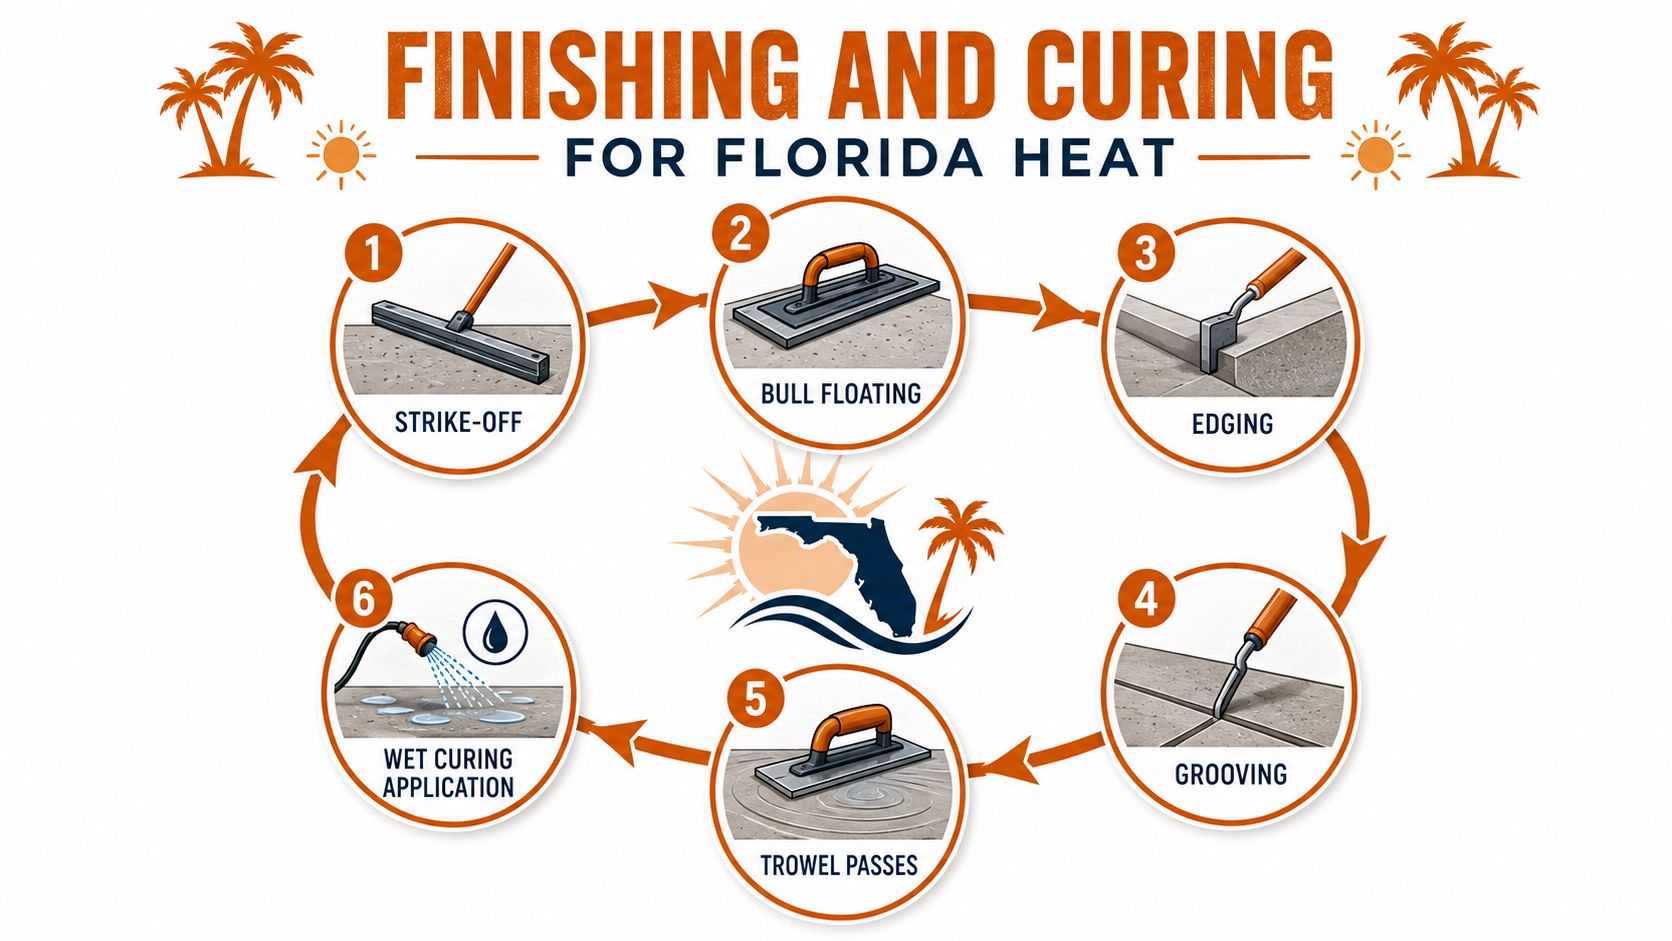
Finishing and curing are one workflow, not two separate chores. The surface gets shaped, sealed, and protected in a short window, and Florida heat doesn't give the crew much room to drift. If the finisher adds water to make the surface “come back,” the slab often pays for it later with dusting, scaling, or early-age cracking.
The finish sequence that holds up
The usual sequence is strike-off, bull float, edging, grooving, and trowel passes, then curing immediately after the surface is ready. In hot, windy Central Florida weather, that transition needs to happen fast. The slab can't sit around waiting for someone to find the curing compound in the truck.
A code-based standard calls for a minimum 3,000 psi design strength at 28 days, a design slump not exceeding 4 inches, and continuous curing for at least 7 days using moist curing or an ASTM C309-compatible membrane-forming compound. Code-based slab standard That combination is about more than paperwork. It's the control point for how the slab hardens and how the surface wears over time.
What proper curing prevents
Curing protects against the surface drying too quickly, which is a real issue in Florida sun and wind. It also helps reduce early dusting and plastic shrinkage. The National Construction Code guidance for slab work calls for 7 days of moist curing and says slabs shouldn't be loaded with stacked materials or construction plant for at least 7 days after pouring. Curing and loading guidance
For a practical field guide on timing, this overview of how long concrete takes to cure helps homeowners understand why patience pays off. If the slab looks finished but hasn't been protected, it's not ready to be treated like a driveway yet.
Inspection and Quality Assurance Checklist
A good pour day runs on checks, not hope. The best slabs I've seen in Marion and Citrus counties usually had one thing in common, somebody verified the details before the truck backed in. That doesn't mean the job was complicated. It means the crew refused to guess.
What should get checked before the pour
A homeowner or project manager doesn't need to run a lab to spot a problem. They need a simple checklist that catches the common failures before they get buried in concrete.
- Subgrade verified. The base should be compacted, even, and ready for load.
- Forms braced. Nothing should move when the concrete starts pushing against it.
- Vapor barrier placed correctly. The barrier should match the slab use and not be damaged.
- Reinforcement covered. Mesh or rebar shouldn't be sitting on the ground.
- Mix verified. The delivered mix should match the project spec.
- Slump accepted. Workability should fit the pour without adding water on site.
- Joint timing planned. Saw cutting should be scheduled before the slab locks up.
- Finishing sequence clear. Strike-off, floating, edging, and curing should all be ready.
- Curing method applied. Moist curing or membrane curing should start on time.
- Loading window respected. No early stacking or traffic on the slab.
ACI 302.1R-15 says construction documents should spell out thickness, strength, mixture proportions, joint locations and details, reinforcement, finish, tolerances, curing, joint filler, special embedments, testing, and QA/QC items. ACI construction document requirements That's not extra paperwork. It's the contract the crew is supposed to build from.
If the homeowner hasn't seen the slab detail before the pour, the job is already behind.
When to Call a Professional Concrete Contractor in Central Florida
A small shed pad can be a reasonable DIY project if the site is simple and the owner understands the limits. A driveway, garage slab, patio tied to the house, or any slab carrying a structure is a different conversation. Once the slab starts interacting with traffic, drainage, or load paths, a licensed contractor should be the one making the calls.
In Dunnellon, Ocala, Belleview, and the surrounding towns, the local variables are what get people in trouble. Sandy subgrades, roof runoff, and hot curing conditions can turn a decent-looking plan into a long-term headache if the detail isn't handled correctly. That's why many homeowners bring in a contractor for removal and replacement of damaged driveways or for new installations where the slab has to perform from day one.
Riverside Sealing & Striping, LLC works on concrete driveways, patios, slabs, and sidewalks across Marion County, FL and Citrus County, FL, including Silver Springs, Summerfield, Crystal River, Homosassa, Inverness, Lecanto, Beverly Hills, Hernando, and The Villages. They're a licensed and insured, family-owned crew based in Dunnellon with reliable scheduling, local Central Florida experience, and free, no-pressure estimates from 7am to 7pm. If the job needs a professional evaluation, a site visit can save a homeowner from the most expensive mistake on the project.
Frequently Asked Questions About Concrete Slab Construction
Can a residential slab handle occasional heavy vehicles?
Sometimes, but only if the slab was detailed for that use from the start. Thickness, base support, joint layout, and reinforcement all need to match the load. A slab built for passenger cars is a different job from one expected to carry RVs, service trucks, or repeated axle loads, especially on Florida subgrade that can shift when the base stays wet.
Can I cut an opening or drain into an existing slab later?
In some cases, yes, but cutting later changes the load path and can weaken the surrounding concrete if the opening was not planned. That risk goes up in slab areas that already carry traffic or support walls and equipment. The safer approach is to frame the opening into the slab detail before the pour, then place reinforcement and joints around it so the slab can move and carry load without cracking in the wrong place.
What does a typical Florida slab cost to install?
Pricing depends on thickness, access, finish, reinforcement, and how much site work comes before the pour. A simple slab may stay near the low end, while tighter access, heavier reinforcement, or more demanding site conditions push the price up fast. For a current cost reference, see Concrete slab cost reference.
Do HOA rules or local code change slab details?
They can. HOA approvals may affect appearance, drainage, or location, while code can affect strength, curing, and structural requirements, so the slab detail should be checked before any work starts. In Marion and Citrus counties, the practical issue is often not the paperwork alone. It is whether the detail handles standing water, sandy soil, and the kind of heat that can dry a surface too fast if the crew does not plan the pour and cure correctly.