
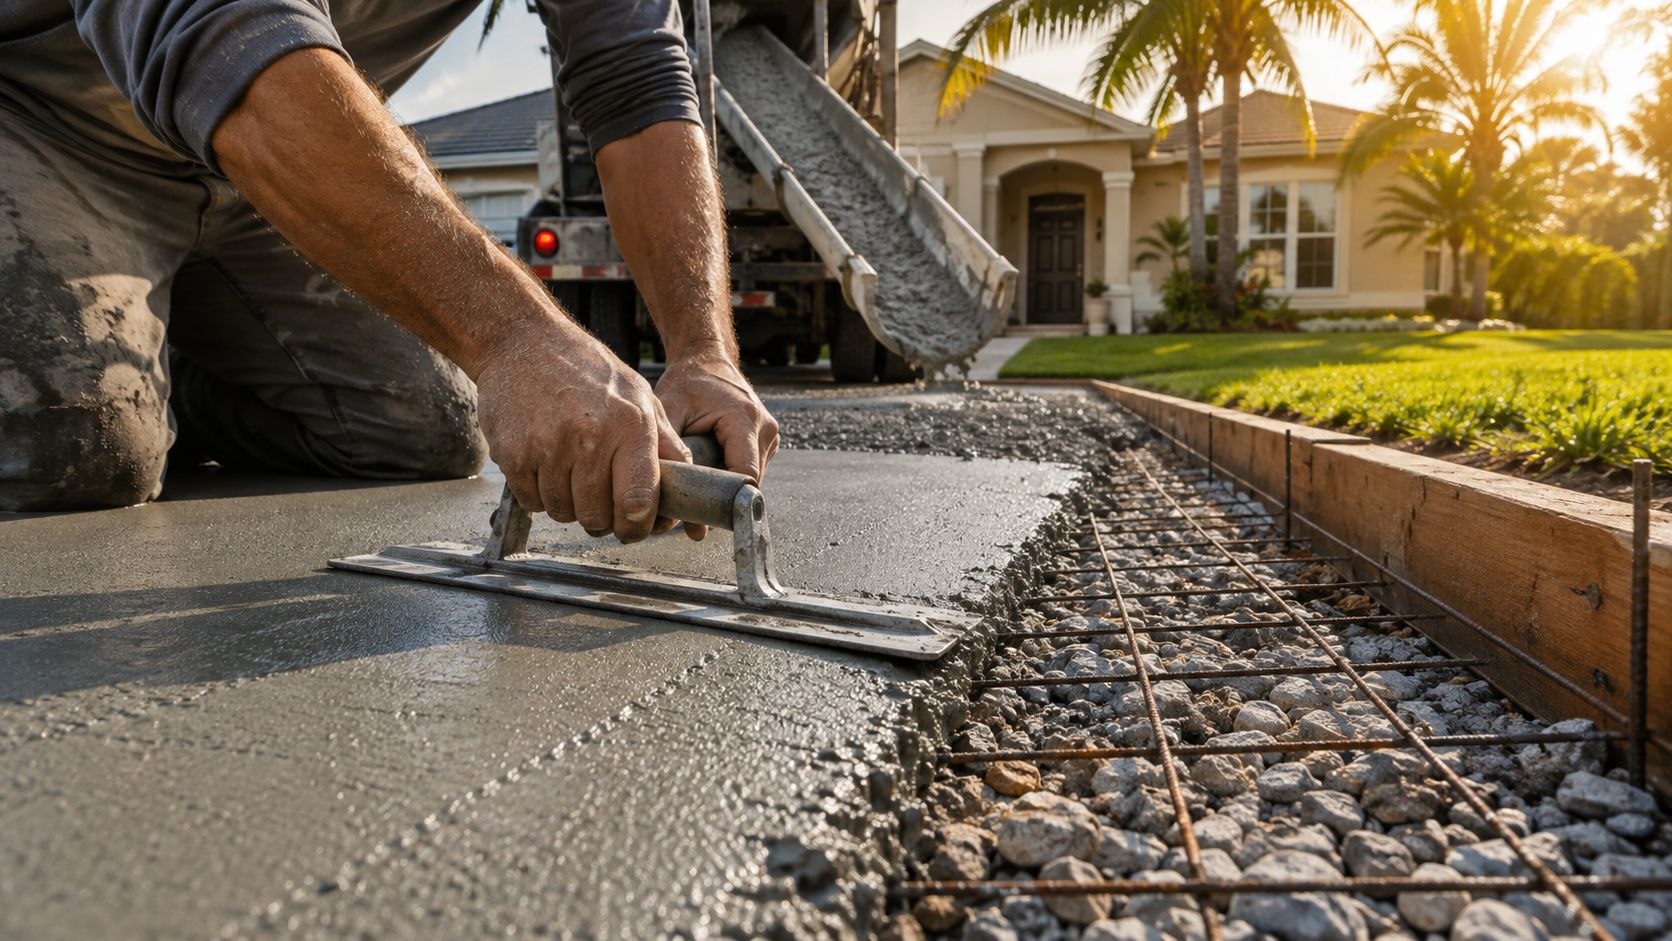
You're standing at the edge of a cracked driveway in Dunnellon, wondering whether another patch will buy you time or whether it's finally smarter to start over. In Marion County, FL and Citrus County, FL, that decision involves more than choosing a surface color. A driveway succeeds when the design, subbase, concrete mix, finish, joints, and curing process work together.
Learning how to concrete a driveway means planning for the vehicles that will use it, preparing the ground beneath it, working around Central Florida heat and rain, and resisting shortcuts that create random cracks. The process below applies to homeowners in Ocala, Crystal River, The Villages, and nearby communities who want a driveway built for actual local conditions.
Table of Contents
- Why Driveway Concrete Work Rewards Careful Planning
- Planning Your Driveway Design and Pulling the Right Permits
- Site Preparation Subbase and Forming the Slab
- Mixing Ordering Placing and Finishing the Concrete
- Curing Sealing and Knowing When to Drive On It
- Florida Heat Rain and Soil What Changes Locally
- Common Mistakes and When to Hire Riverside Sealing & Striping
Why Driveway Concrete Work Rewards Careful Planning
A cracked driveway usually tells a story that started below the visible surface. The slab may have been too thin for the household's work truck, the soil may not have been compacted evenly, or the crew may have finished over bleed water and delayed curing. A fresh broom finish can look excellent on pour day while the underlying design remains unsuitable for the load.
Concrete driveway work is a sequence of connected decisions:
- Design: Match slab thickness, reinforcement, drainage, and joint layout to the property and expected traffic.
- Base preparation: Remove weak material, establish grade, and compact a consistent subbase.
- Mix selection: Specify concrete suited to exterior exposure and the local environment.
- Placement and finishing: Place the concrete evenly, wait for bleed water to disappear, then texture it for traction.
- Curing: Start moisture protection promptly so the slab can develop strength instead of drying too quickly.
Practical rule: A driveway is a structural slab with a finished surface. Treating it like a cosmetic layer is how homeowners end up paying twice.
Florida conditions compress the working timeline. Strong sun pulls moisture from fresh concrete, while rain can interrupt finishing and saturate poorly prepared ground. That's true whether the driveway is in Silver Springs, Belleview, Summerfield, or Beverly Hills.
Before hiring anyone, use a practical list of questions to ask a concrete contractor. The answers should cover the actual slab thickness, subbase work, reinforcement, joint timing, curing method, and responsibility for permits or right-of-way requirements. By the time concrete arrives, the important decisions should already be settled.
Planning Your Driveway Design and Pulling the Right Permits
Start with the vehicles, not the tape measure. A driveway used only by passenger cars has different structural demands from one that regularly carries a delivery vehicle, light truck, RV, boat trailer, or work equipment.
Neutral driveway guidance commonly places residential slabs at 4 inches for passenger cars, while heavier vehicle use often calls for 5 to 6 inches. Increasing thickness from 4 inches to 5 inches can raise load-carrying capacity by almost 50% while adding about 20% to material cost, according to this driveway thickness and load guidance. That trade-off matters when a family expects to keep a heavier truck or RV for years.
Match thickness to the vehicle
| Vehicle Type | Recommended Thickness | Why It Matters |
|---|---|---|
| Passenger cars | 4 inches | Establishes the common residential baseline for lighter vehicle loads. |
| Light trucks and delivery vehicles | 5 to 6 inches | Adds slab depth for repeated heavier wheel loads. |
| RVs and other heavy vehicles | 5 to 6 inches | Reduces the risk of designing only for today's passenger car when heavier parking is expected. |
The table is a starting point, not a substitute for evaluating the soil, drainage, driveway dimensions, and municipal requirements. Thickness alone won't correct a soft or uneven base.
Next, check the layout. Confirm the driveway width, connection to the street, garage transition, sidewalk relationship, property lines, and drainage path. Water should move away from the home rather than collect at the garage or along an edge. If the work approaches a public sidewalk, road, or right of way, ask the applicable building department in Marion County or Citrus County what rules apply before excavation begins.
Plant City provides a useful Florida example of why generic internet advice can be misleading. Its published rule requires concrete within the right of way to be 6 inches thick, 3,000 psi, and fiber-reinforced, with crack-control joints at the right-of-way edge and along sidewalks, and it prohibits steel in that right-of-way section. Review the Plant City right-of-way driveway requirements as an example of how local code can override a standard residential recommendation. Your local jurisdiction may use different specifications.
Mark underground utilities before digging. A proper underground utility location service helps prevent a layout decision from becoming a dangerous excavation problem. A complete pre-pour checklist should identify the vehicle class, proposed thickness, drainage direction, reinforcement, joint plan, right-of-way limits, and permit responsibilities.
Site Preparation Subbase and Forming the Slab
The slab can only perform as well as the ground supporting it. Remove topsoil, roots, organic material, and visibly soft areas until the remaining subgrade is firm and consistent. Bringing in aggregate over weak spots without removing them merely buries the problem.
Grade the excavation so water can leave the driveway rather than sit beneath it. A concrete association identifies subgrade uniformity, drainage slope, correct jointing, and base preparation as structural concerns, not decorative finishing details, in its driveway construction guidance. This is especially important on Central Florida properties where rain can expose low areas quickly.
Build a uniform working platform
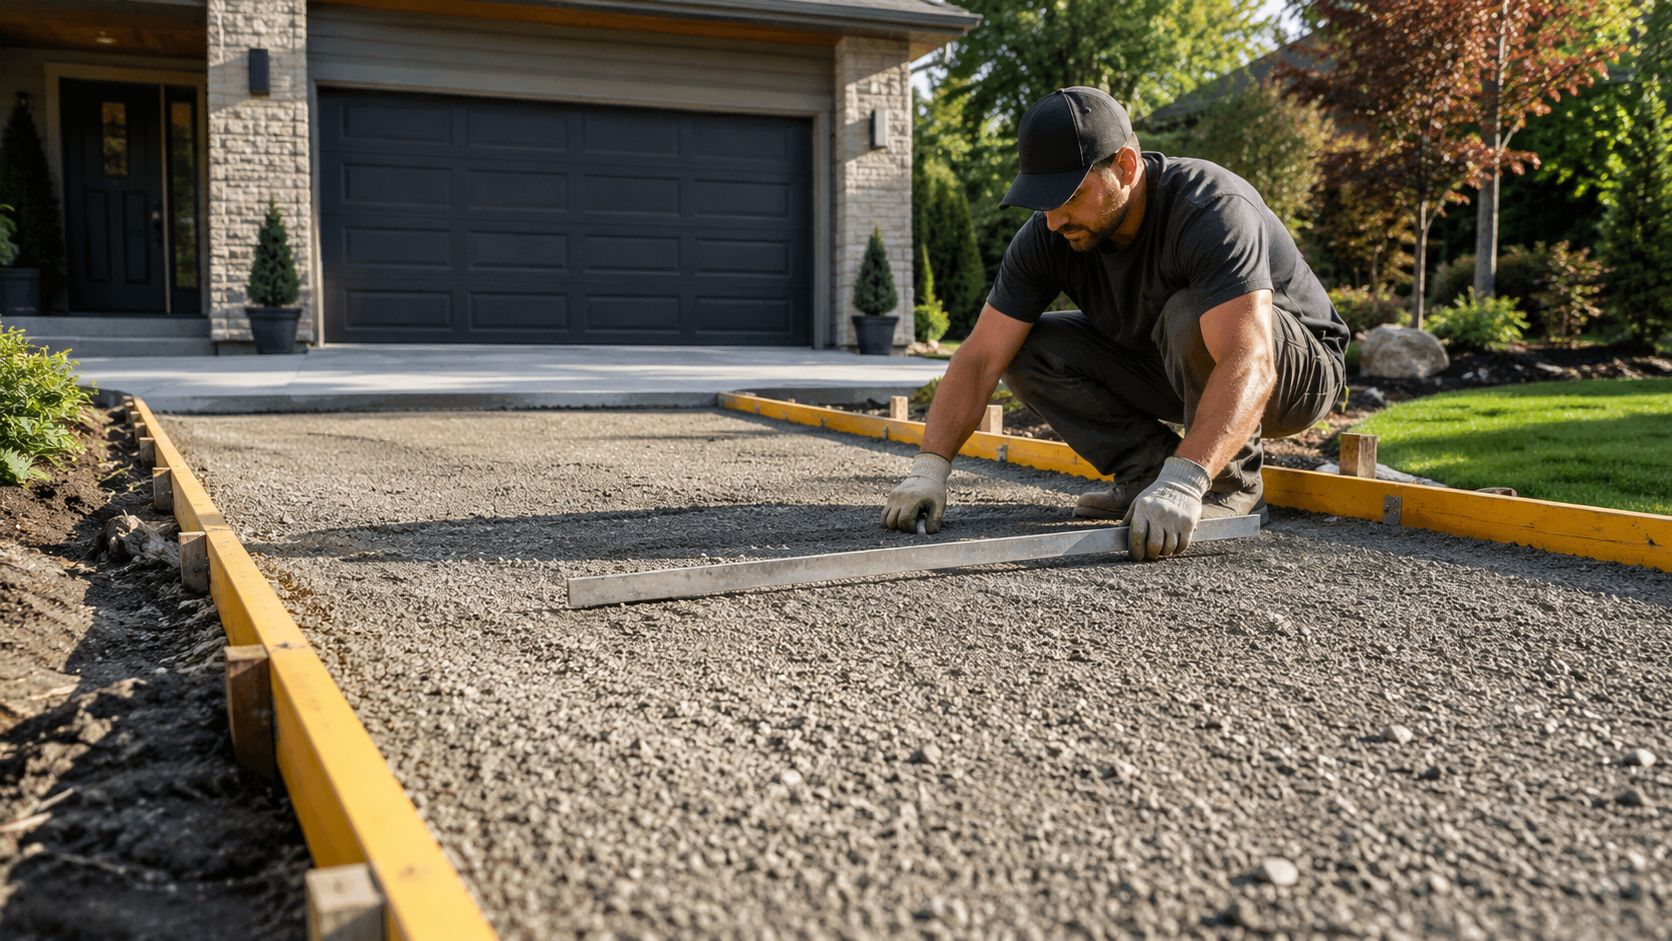
Compact the subbase methodically rather than making a few passes at the edges and calling it done. A plate compactor works well for accessible residential areas, but the operator still needs to address soft pockets, uneven grade, and areas that remain loose after compaction. The target is a consistent platform, not merely a layer that looks level.
A string line stretched between fixed reference points helps check grade. Compare the line to the forms and base at several locations, including the garage, street connection, and side edges. Fix the grade before concrete arrives, because adjusting a poorly prepared base during the pour is too late.
Set forms and reinforcement carefully
Set form boards to the planned elevation and stake them firmly enough that fresh concrete won't push them outward. Check both sides for straightness, confirm corners are square, and clean dirt or hardened concrete from the inside face. Clean forms leave a sharper edge and make the final dimensions easier to control.
Reinforcement should follow the load plan. Depending on the design, that may involve fiber reinforcement, wire mesh, or steel reinforcement. Whatever system is specified, it must stay in its intended position during placement. Reinforcement lying flat on the ground won't provide the same benefit as reinforcement supported within the slab.
Before ordering concrete, walk the site and verify:
- Grade: The base and forms follow the intended drainage path.
- Stability: Soft spots have been removed or corrected.
- Forms: Boards are straight, square, clean, and securely staked.
- Access: The truck, wheelbarrows, pump, and finishing crew have a workable route.
- Reinforcement: The selected system matches the planned vehicle loads and local requirements.
For a more detailed preparation sequence, follow this guide on preparing the ground for a concrete slab. A driveway that starts with a uniform base gives the concrete a fair chance to perform.
Mixing Ordering Placing and Finishing the Concrete
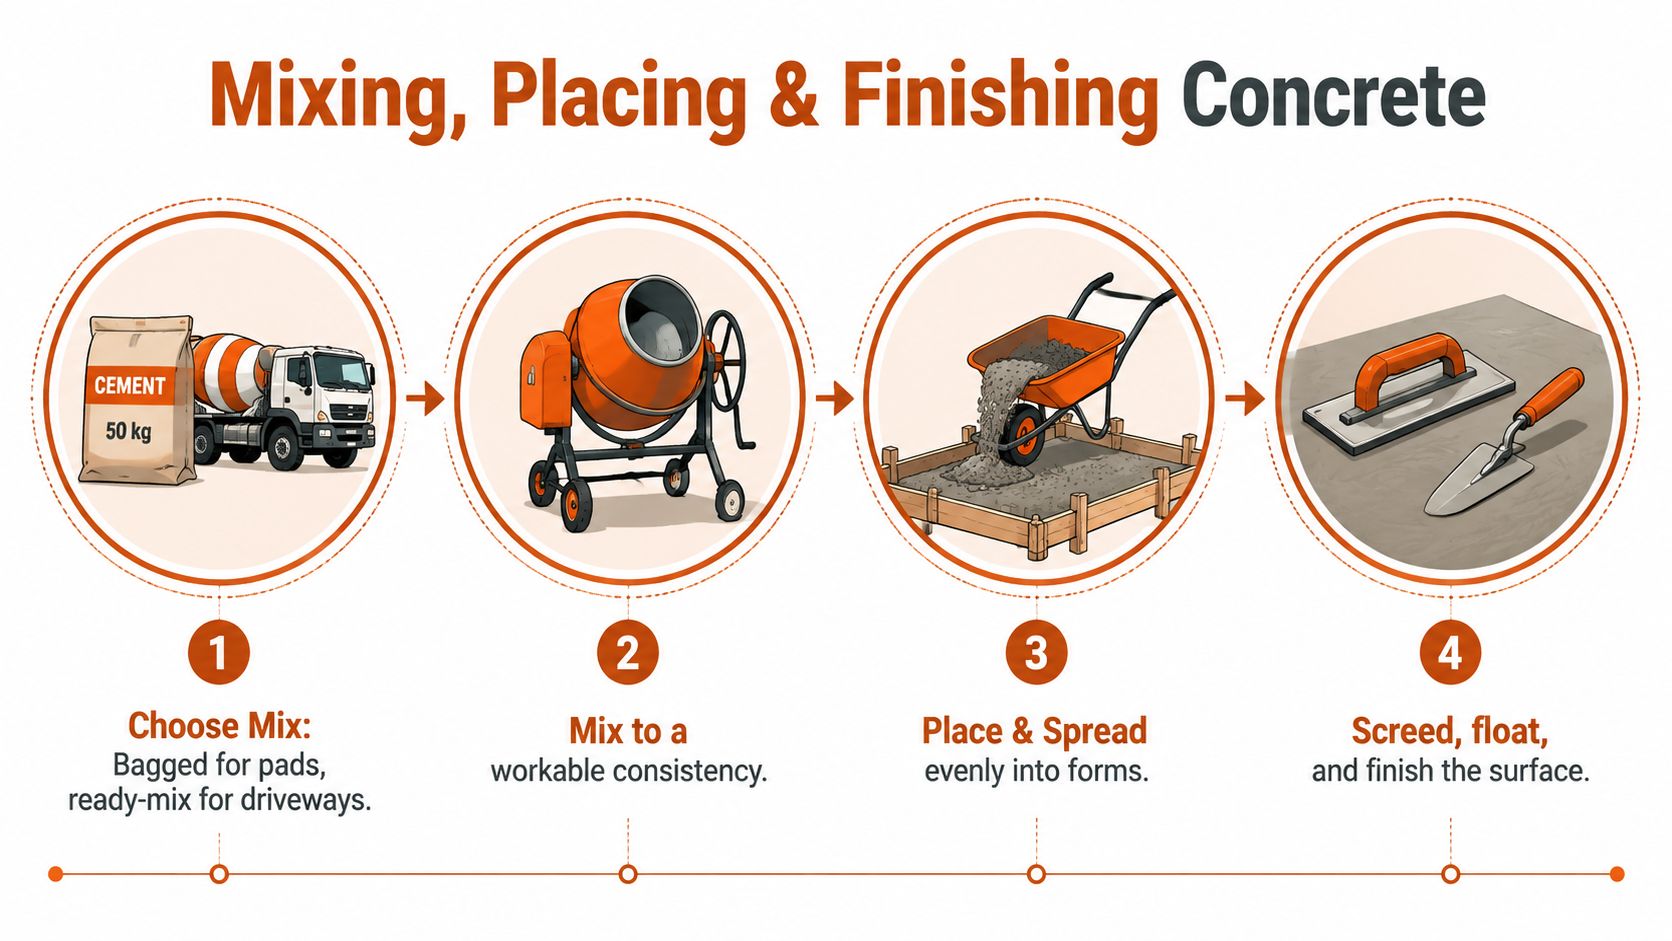
For a small pad, bagged concrete may be manageable. A full driveway generally calls for ready-mix delivery because the crew needs a consistent batch and enough material to place the slab without cold joints or long interruptions. The mix should be selected for the driveway's exposure, expected loads, and local conditions, not just ordered by the lowest price.
Exterior flatwork guidance cites an ACI recommendation of 4,500 psi minimum compressive strength and a 0.45 maximum water-cement ratio for concrete exposed to freezing and deicers, together with air entrainment. Florida doesn't present the same freeze-thaw exposure as northern markets, but the broader lesson remains useful: don't casually add water at the jobsite to make concrete easier to spread. Ask what mix is being delivered and what exposure conditions the contractor considered.
Keep pour-day work in sequence
Place the concrete into the forms and distribute it so the crew isn't dragging large amounts across the slab after it begins to set. Use shovels, rakes, or other suitable tools without adding water to the surface. The team then strikes off the excess with a straight screed board, working across the forms to establish the plane.
The critical pause comes after screeding and initial floating. Fresh concrete releases bleed water. Don't trowel, broom, or seal that water into the surface. The Michigan concrete driveway and sidewalk guidance-1.pdf?hsLang=en) specifically advises finishing only after bleed water disappears, followed immediately by curing and jointing.
Control joints give shrinkage a planned location. Keep joints at no more than two times the slab thickness, cut or tool them to a depth of at least one-quarter of the slab thickness, and arrange panels as close to square as practical. For example, a thicker slab needs joints planned from its actual depth rather than from a favorite layout used on every job.
The working order is straightforward:
- Place: Fill the forms evenly and consolidate the concrete.
- Screed: Strike the surface to the form elevation.
- Wait: Allow bleed water to disappear before final finishing.
- Texture: Apply a broom or other suitable finish for traction.
- Joint and cure: Create control joints at the planned locations and begin curing without delay.
A homeowner can understand this sequence, but a driveway pour is difficult to pause once the truck arrives. Crew size, access, weather, and timing all have to align.
Curing Sealing and Knowing When to Drive On It
Concrete doesn't become usable just because its surface feels hard. It develops strength through curing, and early traffic can damage edges, finish texture, and the slab's developing structure.
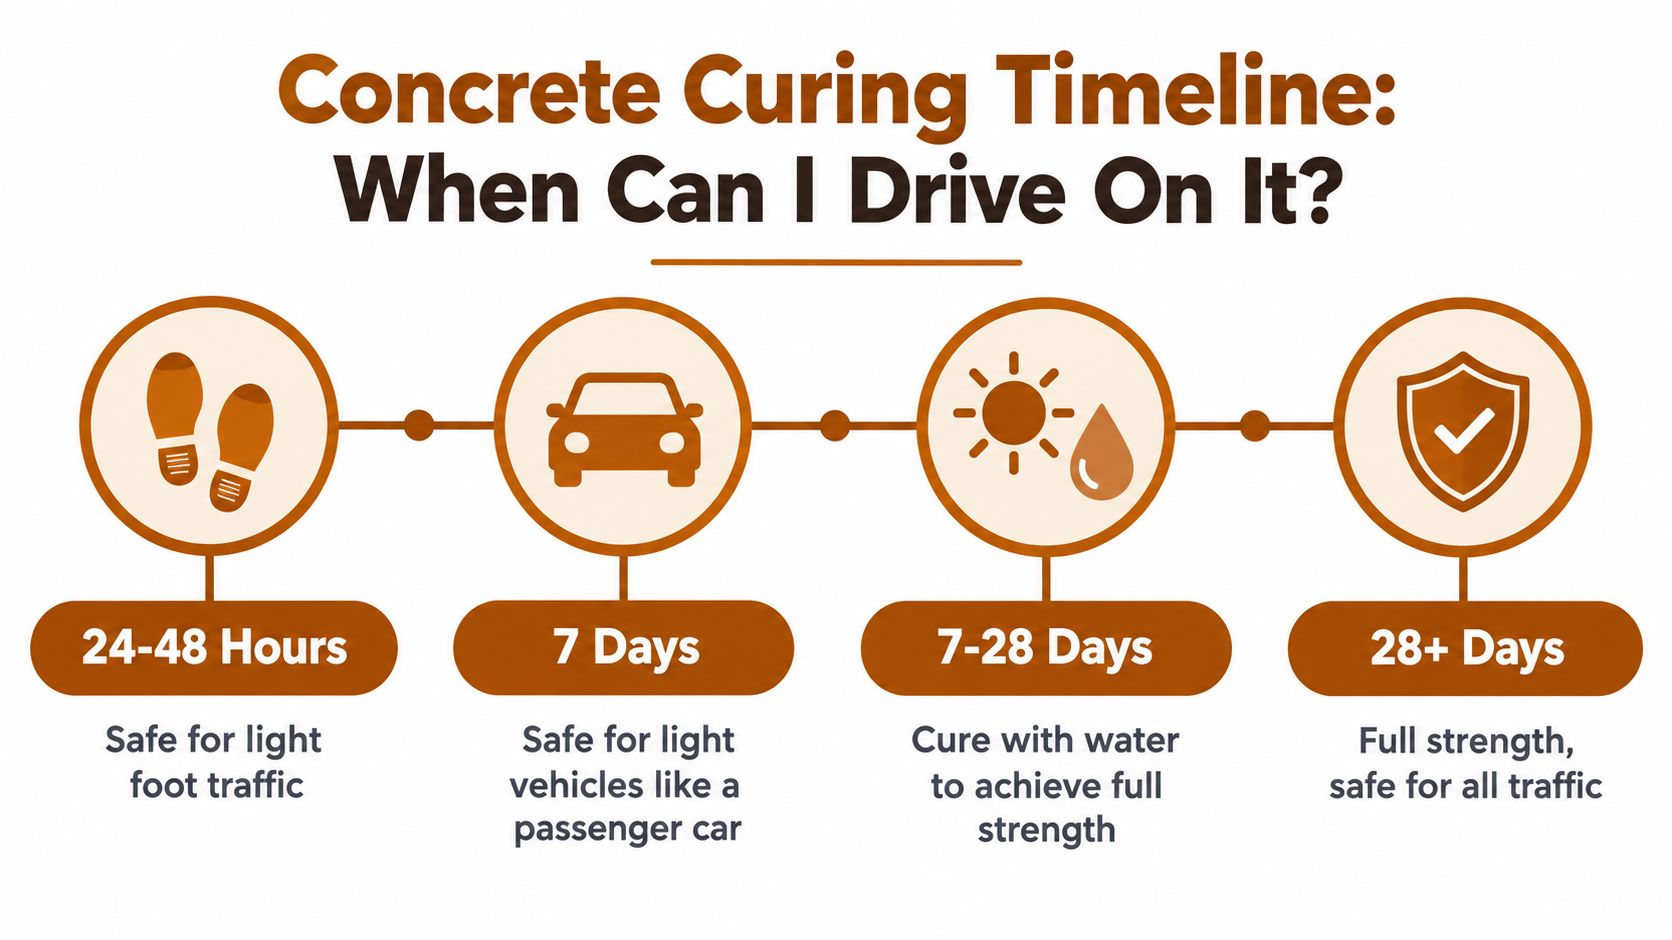
Standard concrete is commonly treated as safe for foot traffic after 24 to 48 hours, while light vehicle traffic is usually delayed until about 7 days. Full design strength is reached at roughly 28 days, and many standard mixes reach about 70% of design strength by day 7, according to this concrete curing timeline.
Protect the slab immediately
Curing should begin as soon as finishing is complete. Use the method specified for the mix and conditions, such as polyethylene cover, curing compound, or continuous water application. The objective is to keep moisture available while the concrete gains strength, not to let Central Florida sun dry the surface immediately after texturing.
A flatwork standards guide recommends keeping fresh exterior concrete warm and continuously moist for about 7 days or until design strength is achieved. The same guidance also describes curing that begins within 30 minutes after texturing and continues for at least 3 days, depending on the specified curing system and project requirements. Read the residential flatwork standards guidance and follow the method selected for the project.
Use this practical schedule:
- First 24 to 48 hours: Keep people and pets off except for necessary access.
- Around day 7: Allow light passenger-vehicle use only if the contractor confirms conditions are suitable.
- Through day 28: Avoid treating the slab as fully developed for unrestricted heavy loading.
- After curing: Discuss sealing with the installer, especially where oil drips, strong sunlight, and surface staining are concerns.
A sealer can support appearance and maintenance, but it can't rescue a weak base, poor joints, or rushed finishing. Sealing too soon can also interfere with moisture leaving the slab, so product selection and timing belong in the project plan rather than as an afterthought.
For homeowners who want a visual explanation of early use and curing, the following video can supplement, not replace, the written curing instructions.
Florida Heat Rain and Soil What Changes Locally
A driveway in Ocala can change pace quickly on pour day. Strong sun shortens the time between placement and finishing, while a sudden storm may force the crew to protect fresh concrete before the planned texture is complete. The schedule should account for both risks before the truck arrives.
Early-morning placement usually gives the crew a more workable window. Have shade, curing materials, finishing tools, and clear storm instructions ready in advance. Covering fresh concrete does not permit rainwater to mix into the surface, and rushing the finish can weaken the driveway.
Treat the ground as part of the Florida design
Sandy Central Florida soil may drain quickly, but drainage does not provide uniform support. Grade and compact the base consistently, with extra attention to areas where vehicles turn, stop, or use the same wheel paths. Around Crystal River and Homosassa, inspect how water moves beside the driveway, landscaping, and low areas before setting the forms.
Vehicle loading should guide the slab design. Passenger cars place different demands on the concrete than work trucks, trailers, or recreational vehicles. Thickness, reinforcement, base preparation, and joint layout should match the intended use and the local right-of-way requirements, rather than relying on a generic four-inch rule.
Florida sun and moisture require disciplined timing. Air entrainment and a controlled water-cement ratio remain useful mix-design considerations, but premature moisture loss followed by heavy rain or surface contamination creates immediate jobsite risks.
Pour-day observation: Heat changes the crew's pace. Plan access, staffing, shade, finishing tools, and curing materials before the truck arrives instead of trying to correct the schedule after placement begins.
Authoritative flatwork guidance recommends 4,500 psi minimum compressive strength and a 0.45 maximum water-cement ratio for specified exterior exposure. It also warns that late finishing or curing can trap bleed water, weaken the surface, and promote scaling. The guidance calls for curing to begin within 30 minutes after texturing and continue for at least 3 days. The flatwork standards reference gives the technical context for those specifications.
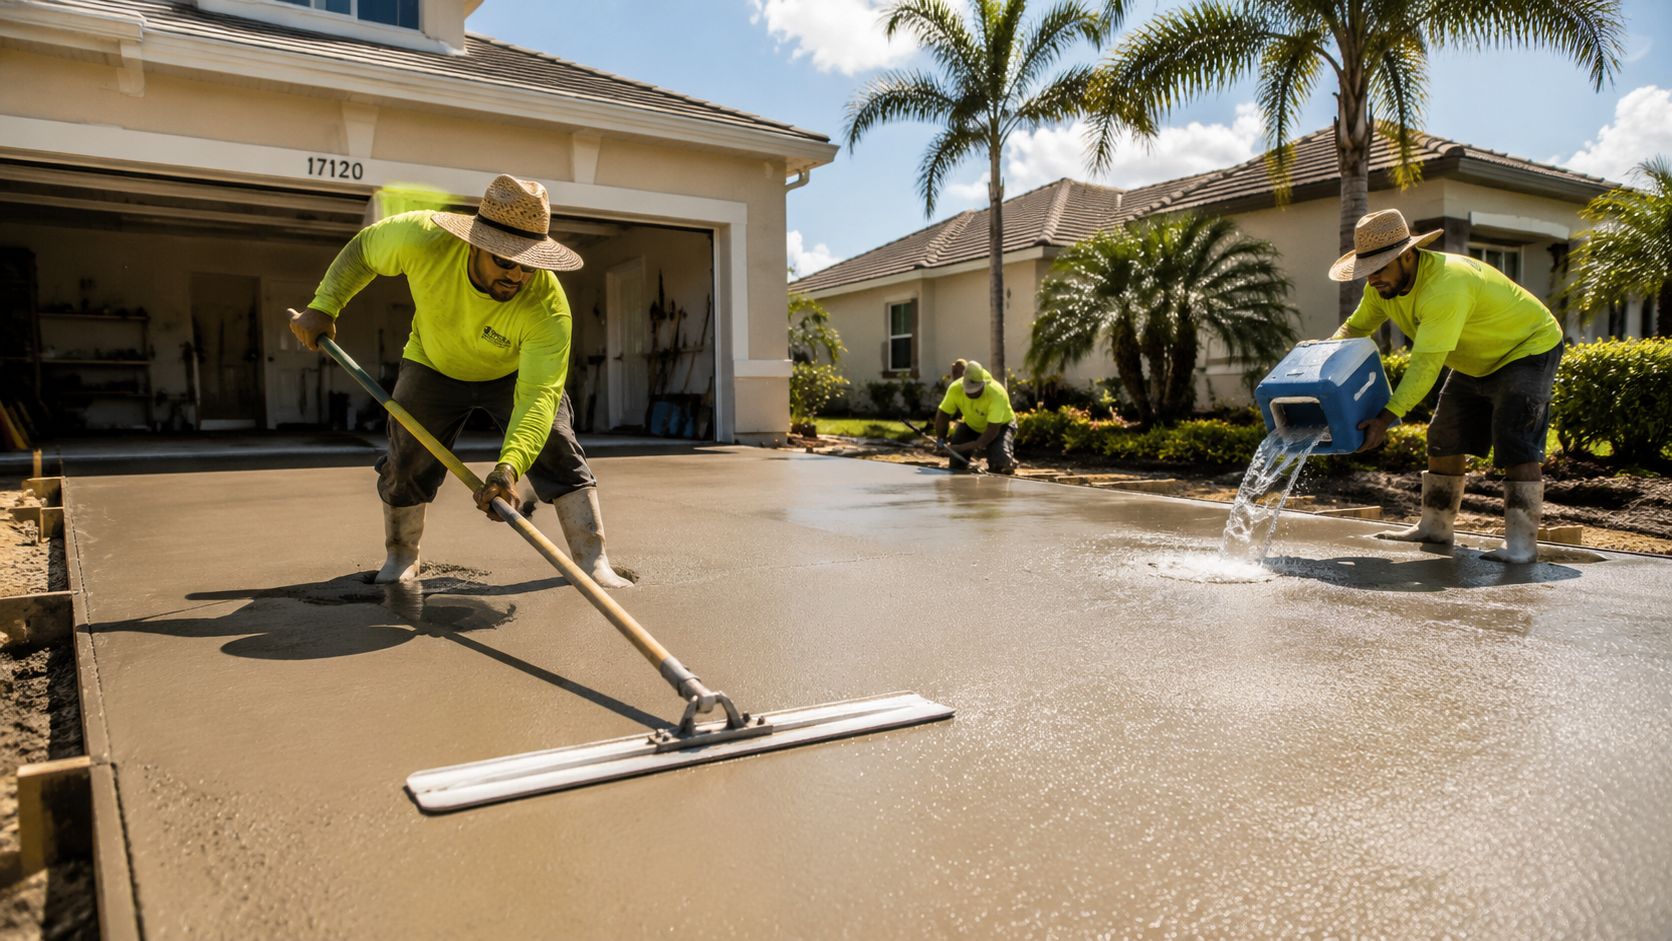
The same approach applies in Inverness, Lecanto, Hernando, and The Villages. Local weather does not replace sound concrete practice. It makes timing, drainage, soil support, and curing control more demanding.
Common Mistakes and When to Hire Riverside Sealing & Striping
The most expensive driveway mistakes usually happen before the surface looks wrong. Homeowners pour a slab designed for passenger cars where a work truck or RV will park, leave soft soil beneath the base, or accept forms that don't establish the intended grade. Others finish while bleed water remains visible, postpone control joints, or let the sun dry the slab before curing begins.
DIY work can make sense for a small, accessible project where the material volume, timing, and finishing demands are manageable. A full driveway is different. Concrete arrives on a schedule, the crew must place it continuously, and weather can turn a normal pour into a race against setting. If the project includes demolition, tight access, complicated drainage, right-of-way work, or heavier vehicles, professional planning is usually the safer choice.
Know what a professional evaluation should cover
A qualified contractor should inspect the existing driveway and surrounding grade, discuss the vehicles that will use it, explain the proposed thickness and reinforcement, and identify where control joints will go. The estimate should also make clear whether it includes removal, disposal, base preparation, forming, concrete placement, finishing, curing, and cleanup.
Riverside Sealing & Striping, LLC is a third- and fourth-generation family-owned company based in Dunnellon, serving Marion County, FL, Citrus County, FL, and surrounding Central Florida areas. Its concrete work includes driveway removal and replacement, new driveways, patios, slabs, and sidewalks, while its broader services include asphalt sealcoating and parking lot striping for commercial properties.
The company is licensed and insured, offers reliable scheduling and clear timelines, and provides free, no-pressure on-site consultations and estimates from 7am to 7pm. Owner Bert Counts brings experience in site preparation, concrete work, sealcoating, and striping. Those details matter because a driveway estimate should address the entire installation, not only the visible pour.
Quick answers homeowners usually need
What affects the cost of a concrete driveway?
The main drivers are the driveway's size and shape, removal requirements, excavation and subbase condition, planned thickness, reinforcement, drainage work, concrete mix, access, finishing, curing, and local right-of-way requirements. A site visit gives a more useful answer than a generic square-foot figure.
How long will a properly built driveway last?
Service life depends on slab design, vehicle loads, subgrade uniformity, drainage, jointing, curing, and maintenance. A driveway built for the actual property and traffic has a better chance of lasting than one designed around the thinnest generic recommendation.
Whether the project is in Ocala, Dunnellon, Belleview, Summerfield, Crystal River, Homosassa, Inverness, Lecanto, Beverly Hills, Hernando, or The Villages, the same principle applies. Build the driveway for the ground and vehicles you have, then give the concrete enough time to cure.
Riverside Sealing & Striping, LLC provides concrete driveway installation, removal and replacement, site preparation, patios, slabs, sidewalks, asphalt sealcoating, and parking lot striping across Marion County, FL, Citrus County, FL, and surrounding Central Florida communities. Visit Riverside Sealing & Striping, LLC to request a free, no-pressure on-site estimate for a driveway designed around your property, vehicle loads, drainage, and Florida conditions.