
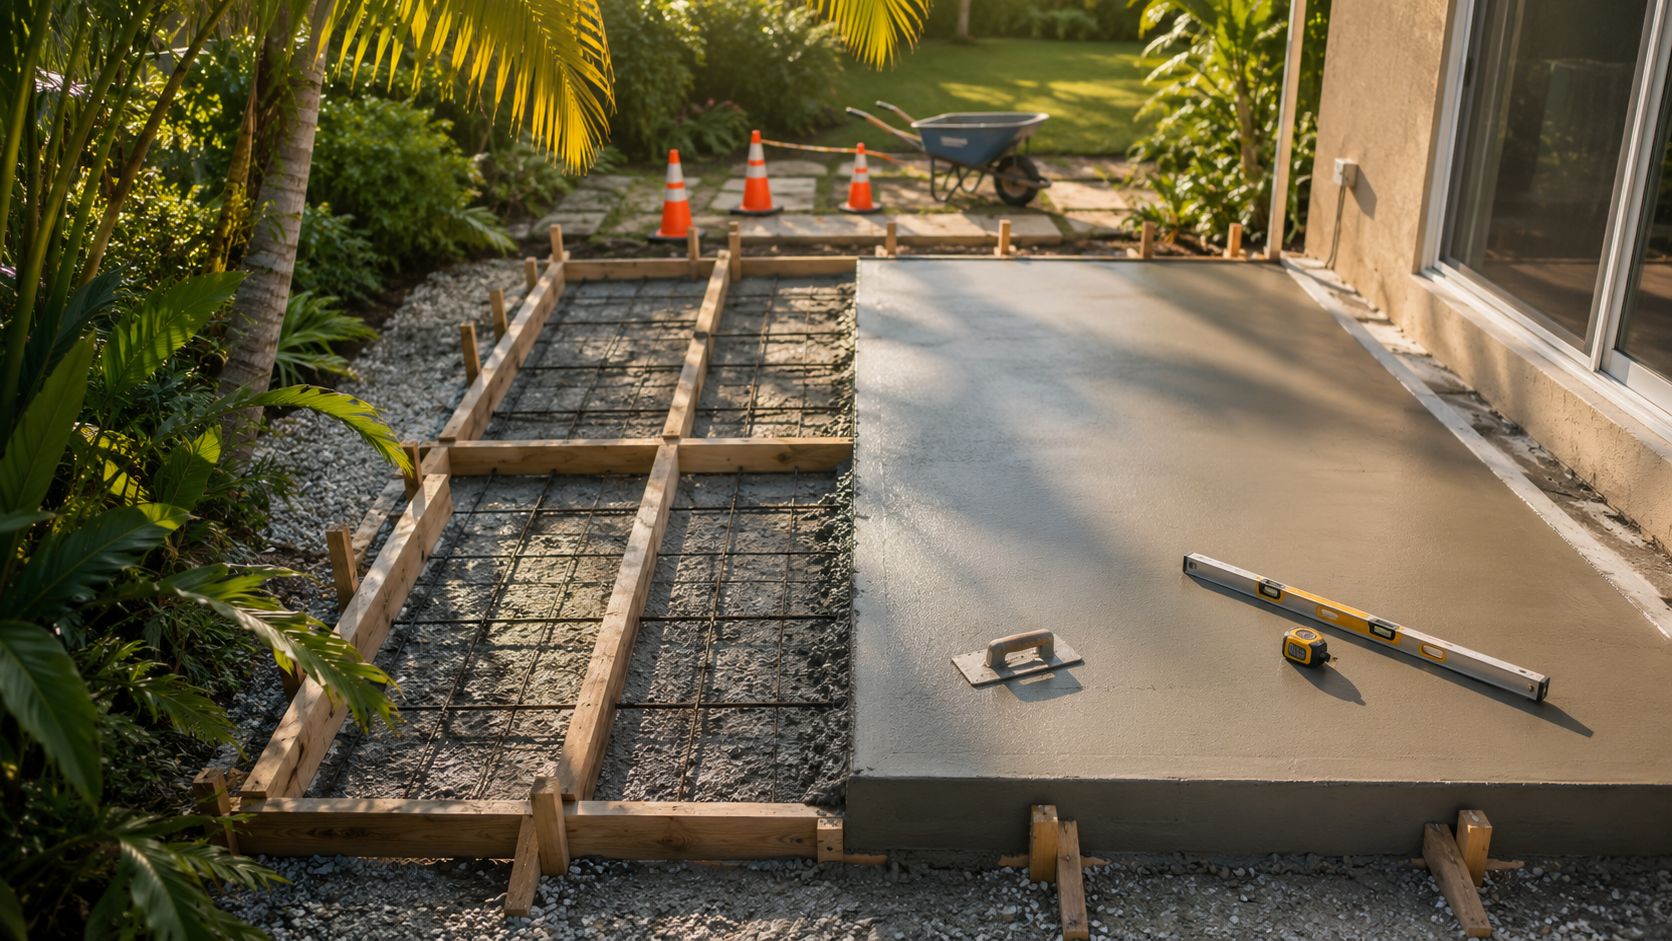
You're probably standing in a patch of grass behind the house, picturing a clean concrete patio outside the sliding door. The design looks simple until rain collects beside the foundation, the edge settles into soft soil, or the finish dries before anyone can broom it. In Central Florida, how to concrete patio isn't just about mixing cement and smoothing the surface. Site preparation, drainage, joint layout, and curing decide whether the slab remains useful after repeated heat and rain.
This guide focuses on the details that many patio how-to articles skip, especially for homeowners in Marion County, FL, Citrus County, FL, and nearby communities such as Ocala, Dunnellon, Belleview, Silver Springs, Summerfield, Crystal River, Homosassa, Inverness, Lecanto, Beverly Hills, Hernando, and The Villages. You'll see which steps a capable homeowner can manage and which conditions justify bringing in a concrete contractor.
Table of Contents
- Planning Your Patio Layout and Size
- Preparing the Site From Stakes to Compacted Base
- Setting Forms, Reinforcement, and Joint Layout
- Mixing, Pouring, and Finishing the Slab
- Curing, Sealing, and the First 28 Days
- Costs, Time, and DIY Versus Hiring Out
- Florida Patio Conditions and When to Bring in a Pro
Planning Your Patio Layout and Size
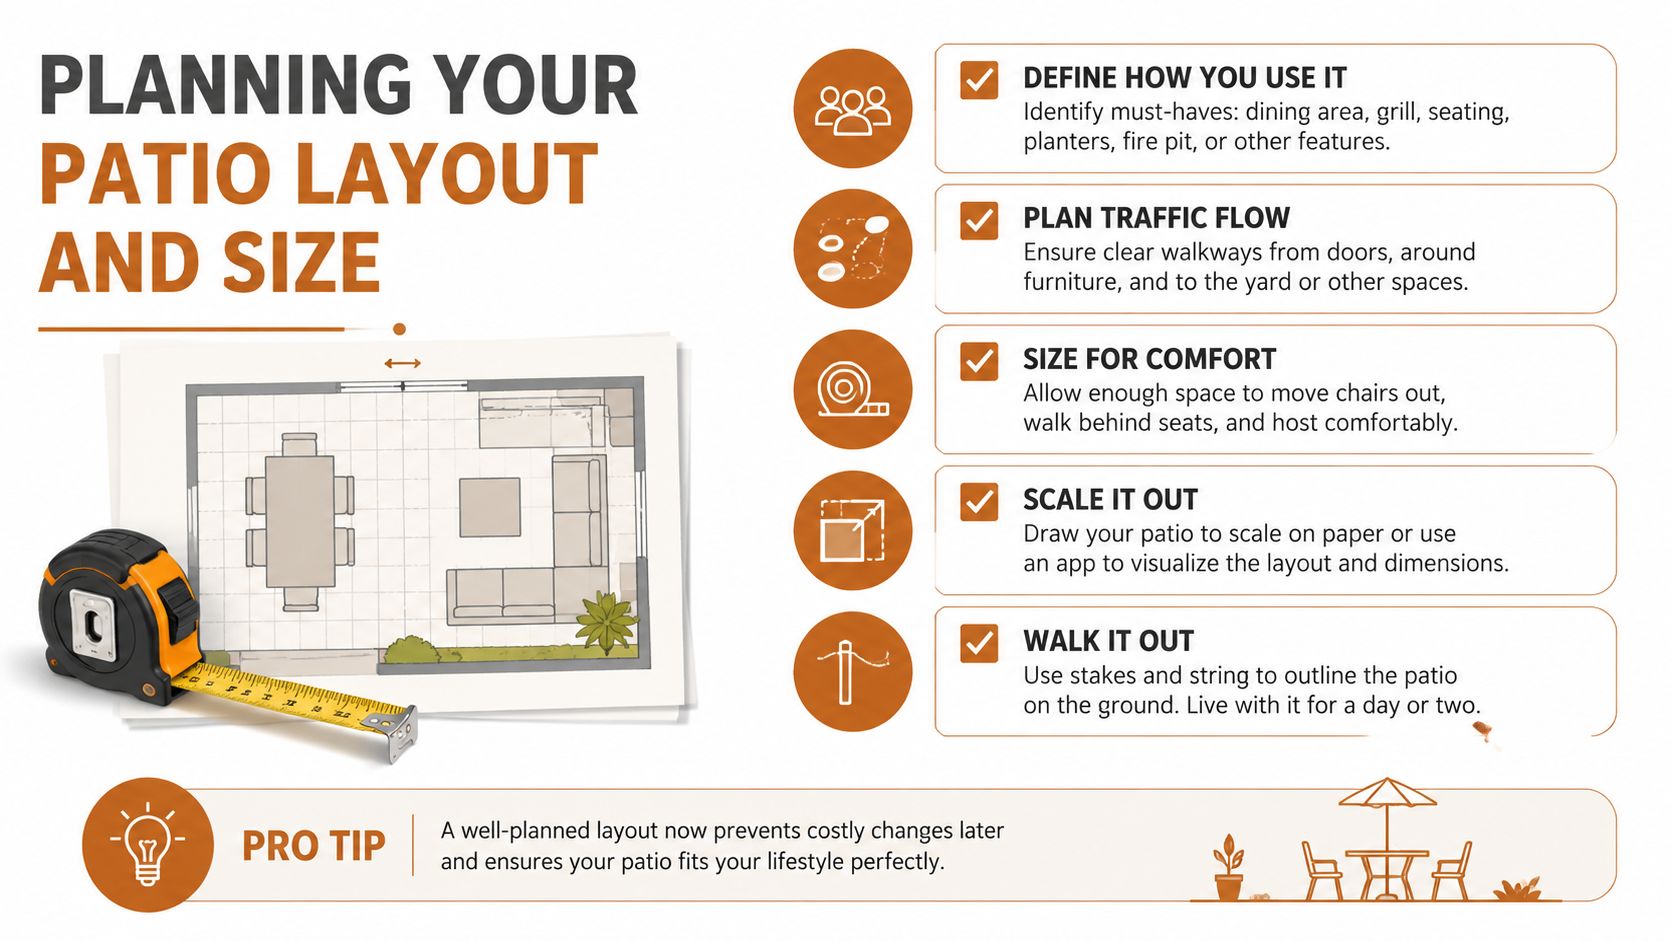
Start with the way your household uses the yard. Mark the position of the dining table, grill, chairs, and the walking route from the back door or slider. A patio that looks spacious on paper can feel cramped once furniture and traffic share the same footprint.
Drive stakes at the proposed corners and stretch string between them. Walk through the space at different angles, check the alignment against the house, and measure the footprint again before ordering materials. Confirm property-line clearances, HOA requirements, eaves, downspouts, air-conditioning condensers, and nearby trees. Roots can lift or disturb a slab, while roof runoff can undermine the edge if it discharges directly onto the patio.
Set the elevation before excavation
Keep the finished patio surface at least one inch below the interior floor, as specified in the project plan, and direct water away from the structure. Exterior patio slabs should generally fall 1/4 inch per foot, about a 2% slope, according to the American Concrete Institute drainage guidance. Even with that slope, small areas of puddling can develop because normal construction tolerances and surface movement affect the finished plane.
Use a builder's level, laser level, or long straightedge to establish the high and low points. Don't let the patio slope toward a door, crawlspace, or foundation wall because that makes the forms easier to set.
Practical rule: Decide where the water goes before you decide where the concrete goes.
Call 811 before digging to identify buried utilities, and check local permit or HOA setback rules. A final sketch should show the patio dimensions, finished elevation, slope direction, joint lines, and drainage outlet. That drawing prevents the common mistake of changing the footprint after excavation has already started.
Preparing the Site From Stakes to Compacted Base
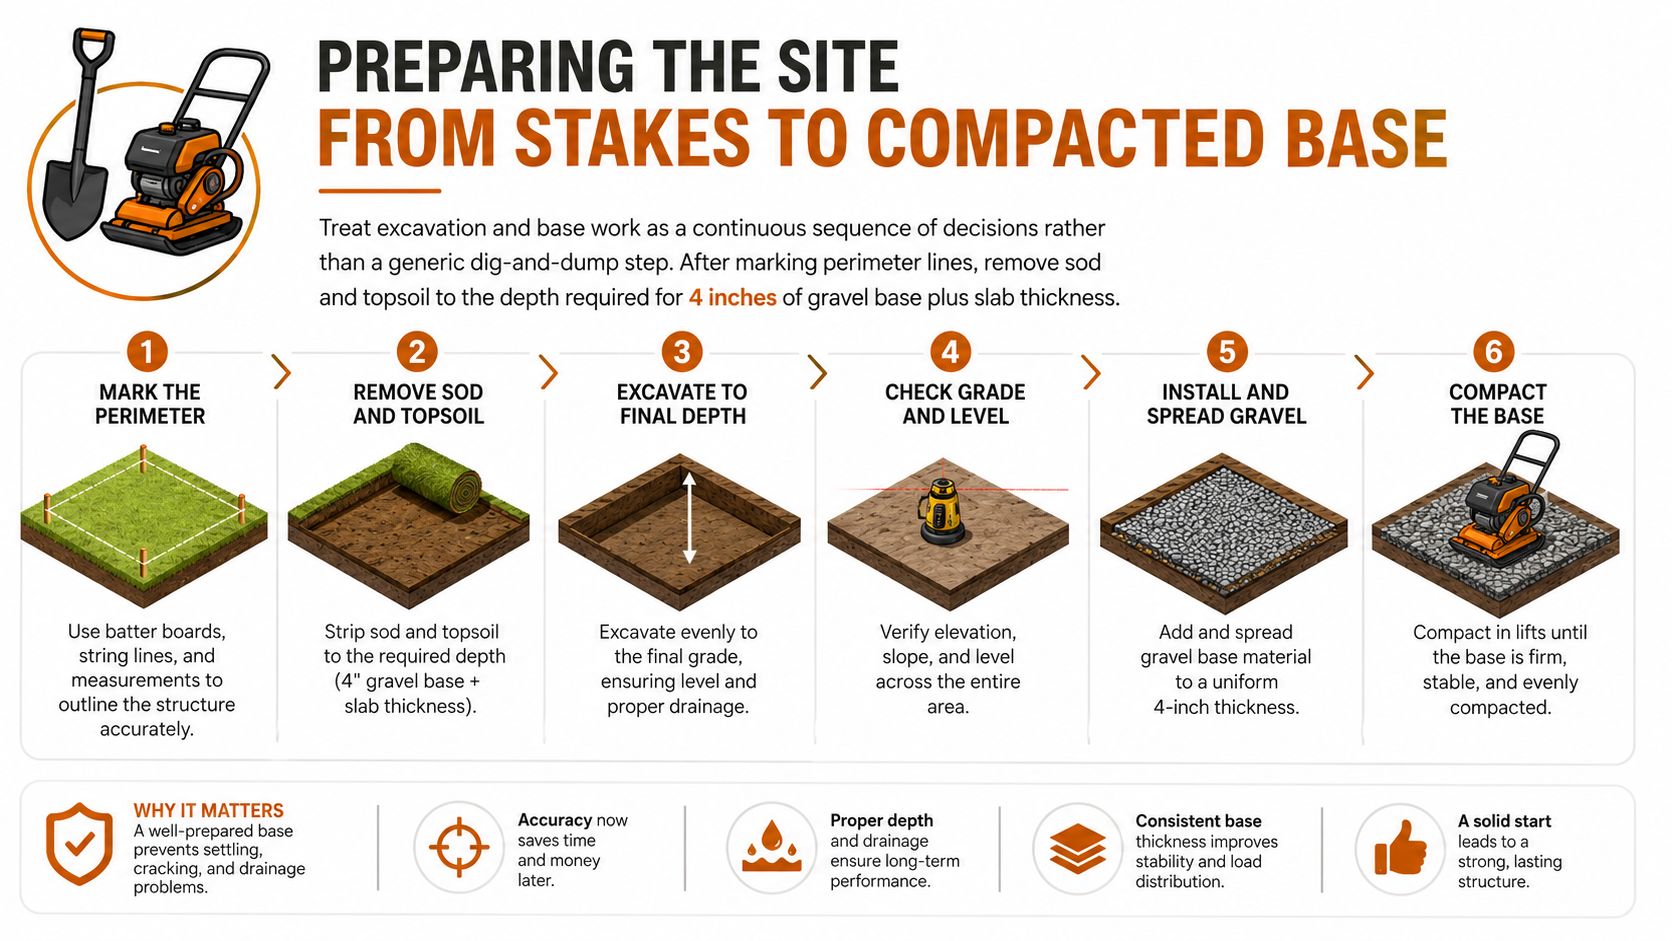
A patio that looks solid at the end of the pour can still fail after two Central Florida summers if sod, loose sand, or wet organic pockets remain below it. Remove all sod, roots, and organic topsoil within the marked footprint. These materials compress and decompose, leaving weak zones beneath the slab. Keep the excavation consistent, and adjust the cut where the yard slopes.
A common residential patio section uses a 4-inch concrete slab over a 4-inch compacted granular base, as described in Broward County patio slab information. The excavation must allow for both layers and the planned slope. Measure from several reference points, not only the highest corner, or the base may end up too thin in another area.
Build the base in controlled lifts
After excavation, set corner stakes and run string lines across the footprint. Check depth at multiple points before placing crushed concrete or #57 stone. Lightly dampen the material, then compact it in two-inch lifts with a plate compactor. Dumping the full base and compacting only its surface leaves loose material underneath.
Central Florida yards often contain sandy fill, clay pockets, buried debris, or organic material from earlier landscaping. Sand may drain quickly, yet loose sand can still shift under load. Clay and wet pockets can pump upward after heavy rain. Remove unstable soil and replace it with suitable granular fill. More stone will not correct a soft pocket if the material beneath it remains weak.
Follow this field sequence for preparing ground for a concrete slab, especially where drainage and soil conditions change across the patio.
Verify the grade before forms
Check the compacted surface against the string lines and confirm that water still moves toward the selected drainage point. Correct low areas now with properly compacted base material. Loose fill added after the forms are set can create a soft seam under the slab.
Walk the area after rain if possible. Standing water, tire tracks, or pumping under the compactor identify problems to correct before concrete arrives.
Setting Forms, Reinforcement, and Joint Layout
Forms establish the slab's final shape and elevation, so they need more attention than just fastening boards around the perimeter. Use straight 2×4 lumber for rectangular edges or flexible bender board for curves. Stake the forms at 24 to 36-inch intervals, then check the top edge against the planned fall. A form that is level when the patio needs a slope will direct water toward the wrong place.
Reinforcement helps manage movement, but it doesn't replace a sound base or properly placed joints. Welded wire mesh can sit on chairs, while heavier loading may call for #3 rebar on an 18-inch grid, as specified in the project plan. Steel should remain near the middle of the slab, supported by dobies or chairs. Mesh lying flat on the ground contributes little because it stays too low after the concrete is placed.
For a concise explanation of steel placement and slab behavior, review this resource on reinforced concrete slabs.
Lay out joints before the pour
Concrete naturally develops shrinkage cracks as it loses moisture. Control joints create planned weak lines so that movement is more likely to occur where you can anticipate it. For a 4-inch patio, a practical joint layout is roughly 8 to 12 feet, based on the guidance for spacing at about 2 to 3 times slab thickness in feet from the patio construction reference.
The joint should reach approximately one-quarter of the slab depth, so a 4-inch slab needs a cut or groove about 1 inch deep. Cut saw joints soon after finishing, commonly within 4 to 12 hours, depending on temperature and mix behavior. Excessive spacing, shallow grooves, or delayed cutting can push cracks into the middle of panels.
| Slab Thickness | Reinforcement | Joint Spacing | Best Use |
|---|---|---|---|
| 4 inches | Welded wire mesh on chairs | About 8 to 12 feet | Light residential patio use |
| 4 inches | Rebar where loading or site conditions justify it | About 8 to 12 feet | Heavier furniture or difficult subgrade |
| 6 inches | Reinforcement designed for the expected load | Based on the engineered layout | Vehicle access or demanding loads |
Align joints with inside corners, changes in width, steps, and other natural weak points. Where the slab meets a house, wall, or other fixed structure, use an appropriate isolation or expansion joint so adjacent materials can move independently. The movement-joint guidance for patios explains why compressible material belongs between sections that shouldn't transfer stress directly.
Mixing, Pouring, and Finishing the Slab
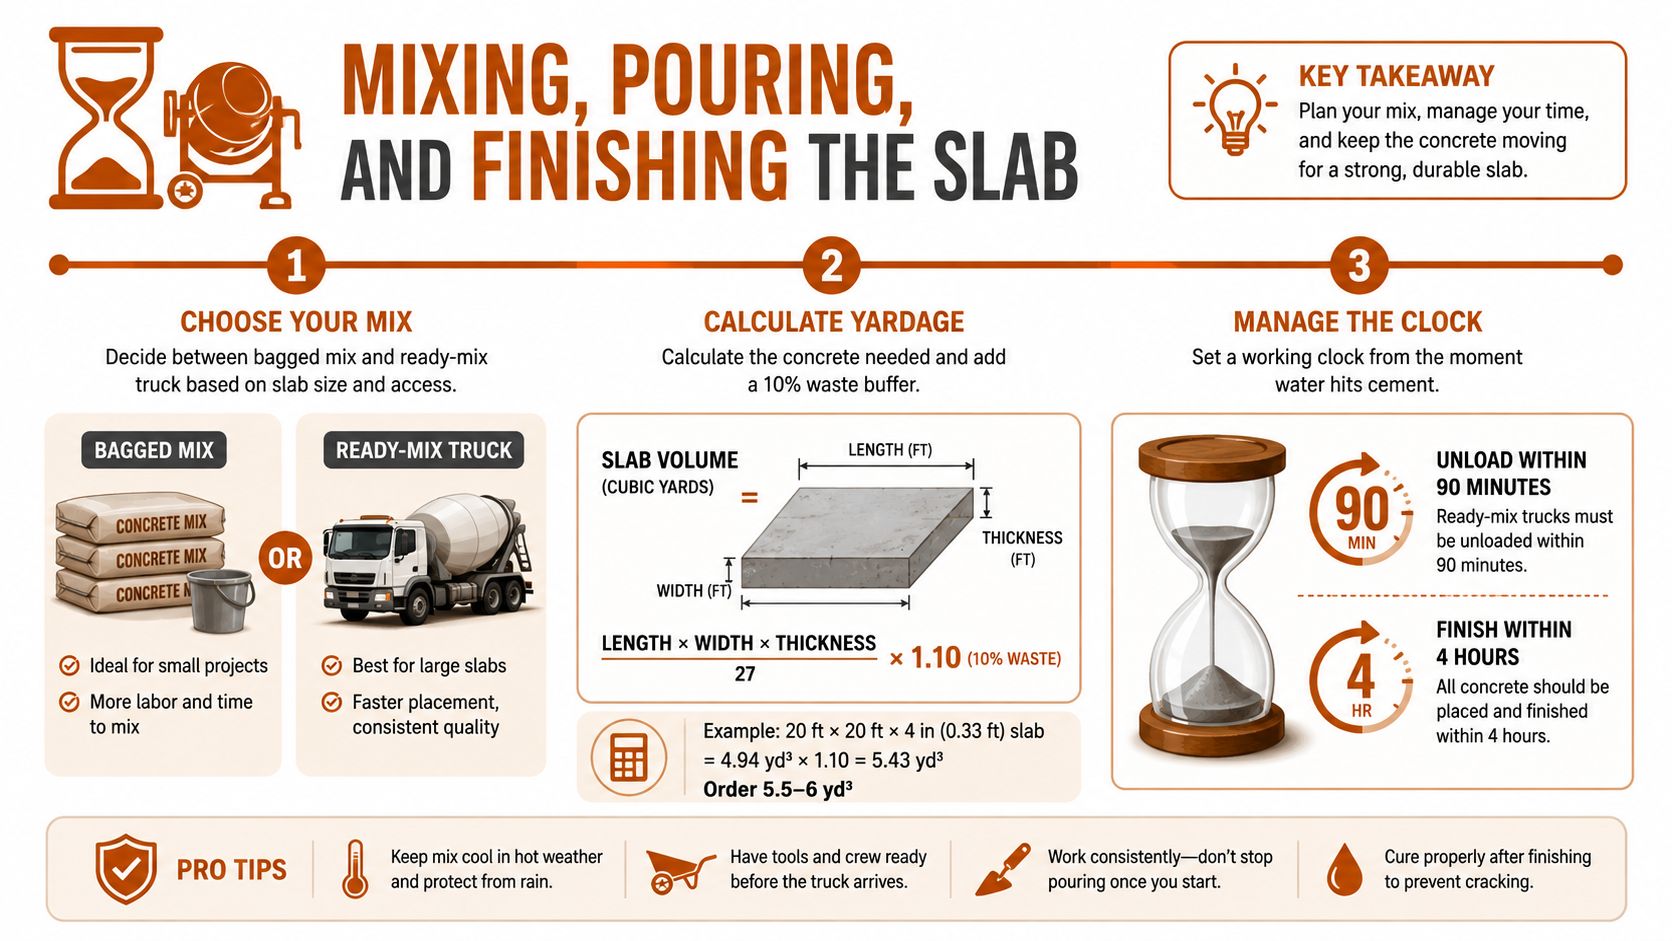
Choose bagged concrete or ready-mix based on the patio's size, access, and available labor. Bagged material can work for a small, simple slab, but mixing enough concrete while keeping every batch consistent is demanding. A ready-mix truck gives a more uniform mix, yet the truck needs clear access and enough people to place, screed, edge, and finish without long interruptions.
Calculate the required volume carefully and include a 10% waste buffer, as specified in the project plan. Keep the pour organized before water reaches the cement. Once the mix starts arriving, one person should direct placement, others should move and consolidate the concrete, and the finishers should stay close behind.
Place and strike off systematically
Place concrete against the forms in manageable layers, not in tall piles. Use a come-along or concrete rake to move the material without pulling excess paste across the surface. Avoid adding water to make stiff concrete easier to spread. Extra water can weaken the surface and encourage shrinkage problems.
Screed with a straight 2×4 using a sawing motion across the forms. Keep the board moving while a second person fills low spots. Bull-float immediately afterward to close the surface and push coarse aggregate below the finish plane.
The finish sequence should remain orderly:
- Screed the surface to the form height.
- Bull-float while the concrete remains workable.
- Edge the perimeter after the bleed water changes.
- Joint the planned lines with a groover or saw.
- Float to refine the surface.
- Broom for traction, or apply the specified decorative finish.
Wait for bleed water to disappear before edging, jointing, or brooming. Finishing water back into the surface can weaken the top layer. In Central Florida heat, smaller working bays, shade, and light misting can help prevent premature drying, but don't spray water onto concrete that is actively bleeding.
A visual demonstration of the pour and finish sequence is included below.
Curing, Sealing, and the First 28 Days
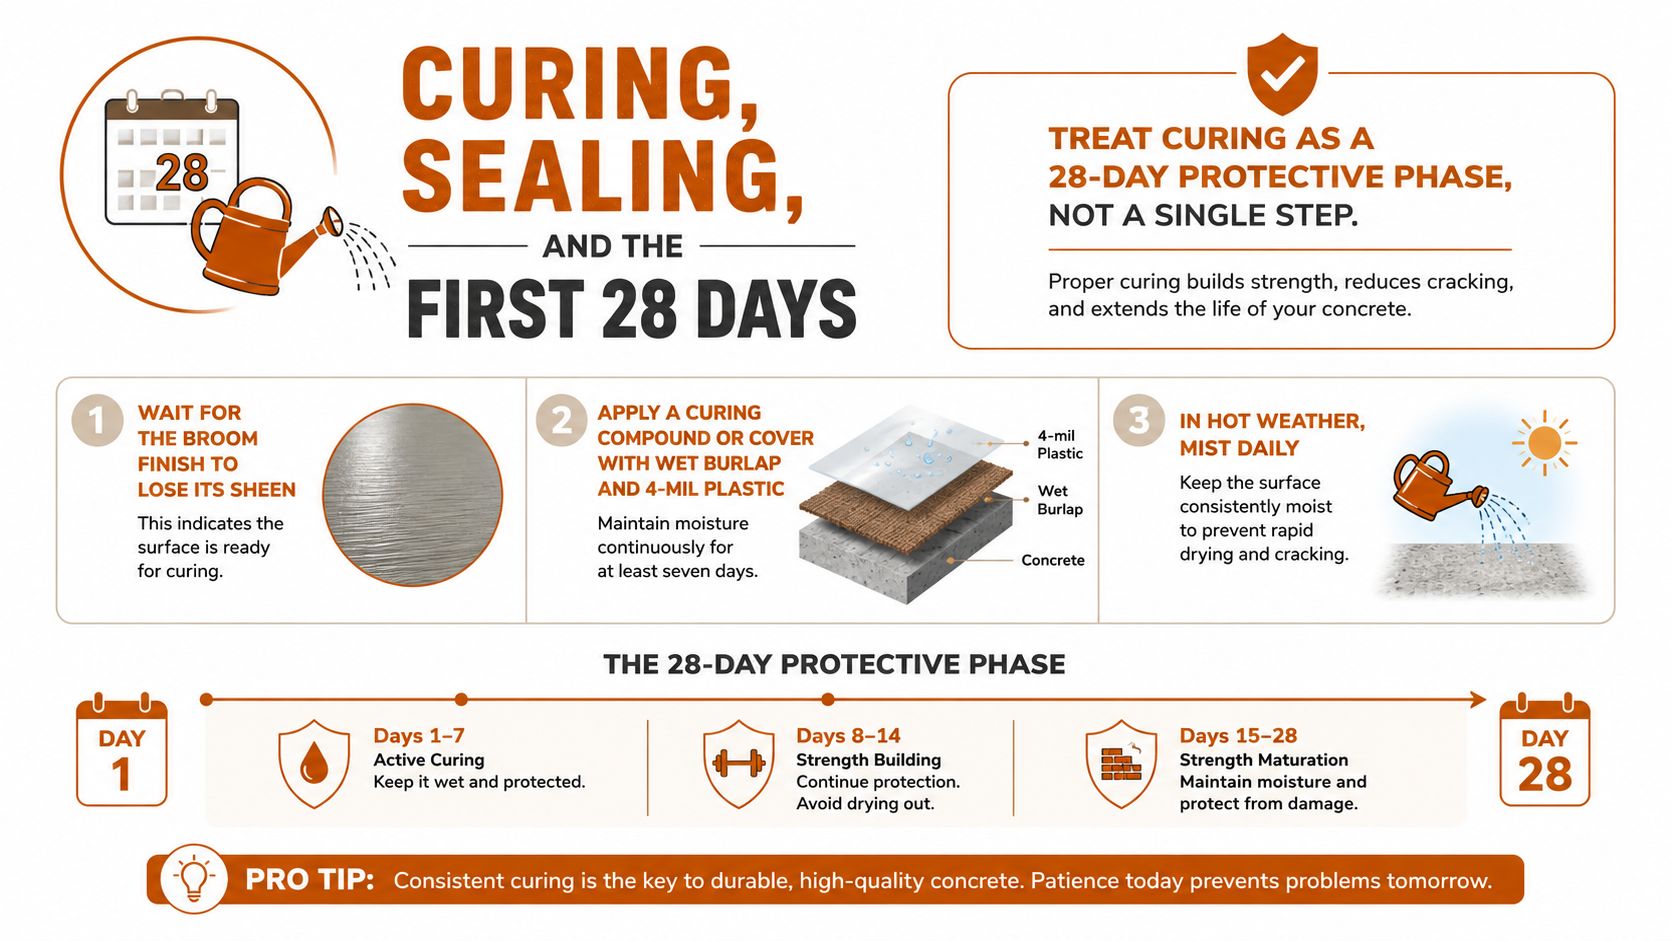
Fresh concrete still needs protection after the finishing tools leave. Curing keeps moisture available for cement hydration, helping the slab gain strength instead of drying too quickly at the surface. Technical guidance recommends sustained moisture for at least 7 days, while 28 days remains the standard full-cure benchmark, as explained in this concrete patio thickness and curing overview.
Central Florida heat, direct sun, and moving air can dry an exposed patio before the cement hydrates properly. Once the broom finish loses its sheen, apply a compatible curing compound, or cover the slab with wet burlap and 4-mil plastic. Secure the covering against wind and check the edges daily. Rain is not a substitute for controlled curing, especially when runoff collects along a form or washes soil against the slab.
Respect the loading timeline
Concrete may be walkable in 24 to 48 hours and can often support a passenger car after about 7 days. Full design strength is generally treated as reached at 28 days. Keep heavy furniture, grills, planters, and concentrated loads off the slab during early curing, and lift rather than drag anything across the surface.
Sealing comes after the concrete has cured and dried thoroughly, commonly around 28 days. A penetrating acrylic sealer suits many broom-finished patios. Stamped or colored concrete may require a denser film-forming product matched to the finish. Follow the manufacturer's preparation and application directions, and never apply sealer to damp concrete.
Use this guide to how long concrete takes to cure when checking moisture conditions and planning the first maintenance coat. In practice, drainage still matters after curing. Keep roof runoff and irrigation from ponding beside the slab, because saturated Central Florida soil can undermine an otherwise sound patio.
Costs, Time, and DIY Versus Hiring Out
A 12-by-12 patio at 4 inches thick requires roughly 1.78 cubic yards of concrete. Treat that figure as a planning estimate, then account for waste, access, and the condition of the soil. In Central Florida, a low material quote can lose its advantage if the site needs extra excavation, imported base, or drainage correction.
Bagged mix may cost $160 to $220 per yard in materials, while a short-load ready-mix delivery may run $125 to $180 per yard plus a delivery fee. These are illustrative planning ranges, not fixed prices. Forms, reinforcement, base material, a plate compactor, finishing tools, curing supplies, and sealer can move the final budget substantially.
For a patio of this size, the DIY budget may fall between $900 and $1,800. Professional installation may range from $2,400 to $4,200 in Central Florida. Access, finish, reinforcement, excavation, and drainage work account for much of the difference.
| Cost Item | DIY | Hired Pro |
|---|---|---|
| Concrete and delivery or bagged mix | Purchased directly | Included in project estimate |
| Base preparation | Homeowner supplies and compacts | Crew excavates and compacts |
| Forms and reinforcement | Purchased or rented | Selected and installed for the site |
| Finishing equipment | Rental or owned tools | Contractor equipment and crew |
| Labor | Homeowner labor | Professional placement and finishing |
| Typical 12-by-12 project range | $900 to $1,800 | $2,400 to $4,200 |
DIY suits a simple, square, ground-level slab with easy access and several capable helpers. Two people should expect a long weekend for the pour and finishing, plus a week of evening preparation. The hard part is maintaining a continuous placement and finishing window. A delay can leave cold joints, uneven edges, or a rough surface.
A professional crew can often place and initially finish the slab in a day, while sealing follows the curing period. Hire out the work when the site has difficult access, a slope, decorative finishing, a large footprint, a foundation connection, or drainage problems. On Florida sites, paying for proper base preparation and water control is usually cheaper than repairing settlement or washout later.
Florida Patio Conditions and When to Bring in a Pro
Central Florida conditions can look forgiving until a patio crosses several soil types in the same footprint. Sandy fill may sit over marl pockets, seasonal groundwater can be relatively shallow, and afternoon storms can send intense runoff across a yard. When saturated subgrade moves beneath a loaded slab, the concrete may settle, pump, or crack. Organic pockets buried in fill create the same problem in a smaller area.
Drainage errors often show up along the patio edge. Water can wash out poorly compacted material, collect beside the foundation, or follow a path toward a doorway. The planned 1/4-inch-per-foot fall helps direct runoff, but the grade still needs a clear discharge point rather than ending at the edge of the slab.
Heat changes the pour schedule. Concrete placed above 90°F can lose slump quickly and set before the crew has finished edging and jointing, according to the project conditions. The first dry afternoon can expose weak curing, especially when wind and direct sun pull moisture from the surface.
Know when DIY stops making sense
Hire a qualified contractor when the project involves:
- Large slabs: Any patio over 200 square feet deserves a realistic labor and finishing assessment.
- Foundation connections: A pour against the house requires careful elevation, isolation, and drainage decisions.
- Poor drainage: Standing water, soft spots, buried debris, or a high water table can defeat a basic DIY approach.
- Complex access: Tight gates or long wheelbarrow runs can create cold joints and inconsistent finishing.
- Continuous scheduling: If you can't commit to a same-day excavation, placement, and finishing window, postpone the pour or hire a crew.
- HOA restrictions: Surface color, broom direction, drainage easements, and setbacks may require documentation or a licensed, insured contractor.
Riverside Sealing & Striping, LLC provides site evaluations, concrete patio and slab installation, reinforced concrete work, weather-resistant finishes, and sealing services across Central Florida. The company also handles asphalt sealcoating and parking lot striping, so property owners can address concrete and asphalt needs through one local contractor rather than treating the business as asphalt-only.
Riverside Sealing & Striping, LLC offers free, no-pressure consultations and estimates for patio site preparation, drainage review, concrete pours, and sealing work in Marion County, Citrus County, and surrounding Central Florida areas. If your patio has a difficult grade, uncertain soil, or a tight connection to the house, visit Riverside Sealing & Striping, LLC to request a professional evaluation from a licensed and insured local team.