
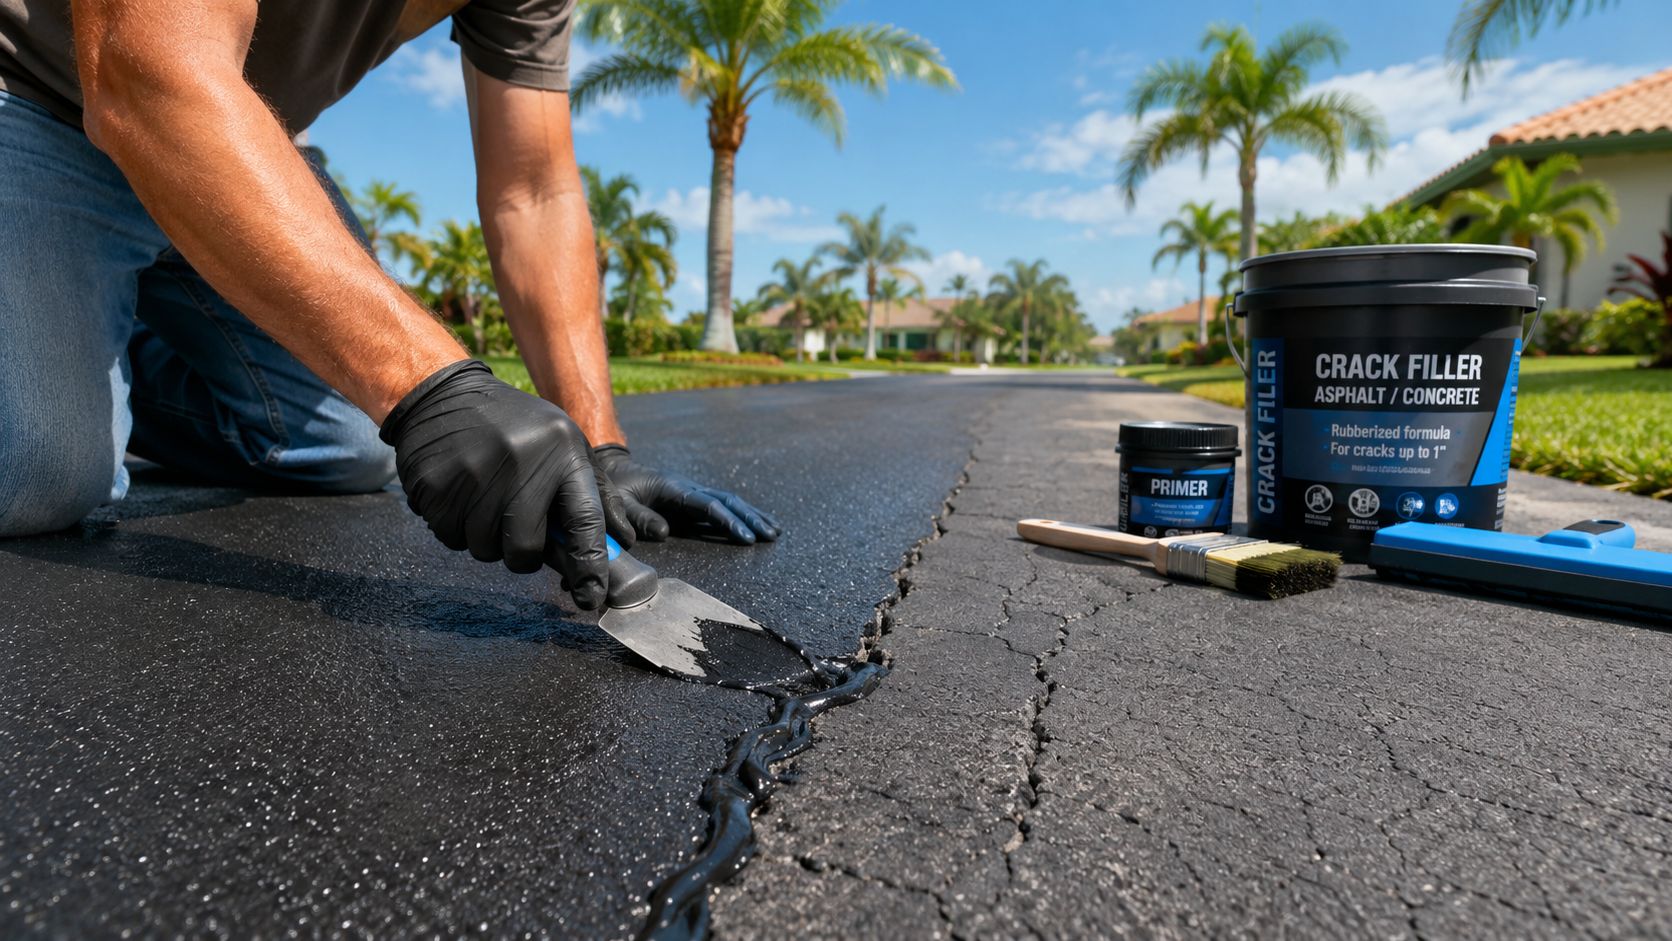
You're probably staring at a cracked driveway, a flaking edge, or a small pothole and wondering if this is a quick weekend fix or the start of a bigger bill. In Marion County, FL and Citrus County, FL, that question matters because heat, rain, and traffic keep exposing weak spots fast. The smart move is to treat driveway repair DIY as a decision, not just a repair, especially when you're trying to protect your wallet and avoid doing the same job twice.
Table of Contents
- Assessing Your Driveway Damage Type
- Tools and Materials You Need for DIY Repair
- Step-by-Step Repair Procedures for Common Issues
- Sealing and Finishing Your Repair
- Central Florida Weather and Timing Considerations
- When to Call a Professional and Maintain Your Driveway
Assessing Your Driveway Damage Type
The driveway problems I see most often around Ocala, Dunnellon, Belleview, Silver Springs, Summerfield, Crystal River, Homosassa, Inverness, Lecanto, Beverly Hills, Hernando, and The Villages are surface cracks, crumbling edges, potholes, and spalling. The mistake is treating every one of them as a simple crack fill. A hairline crack that stays dry and does not move can often be patched, while a sunken slab, a crack that keeps opening, or a broken edge can point to base failure that patch material will not correct.
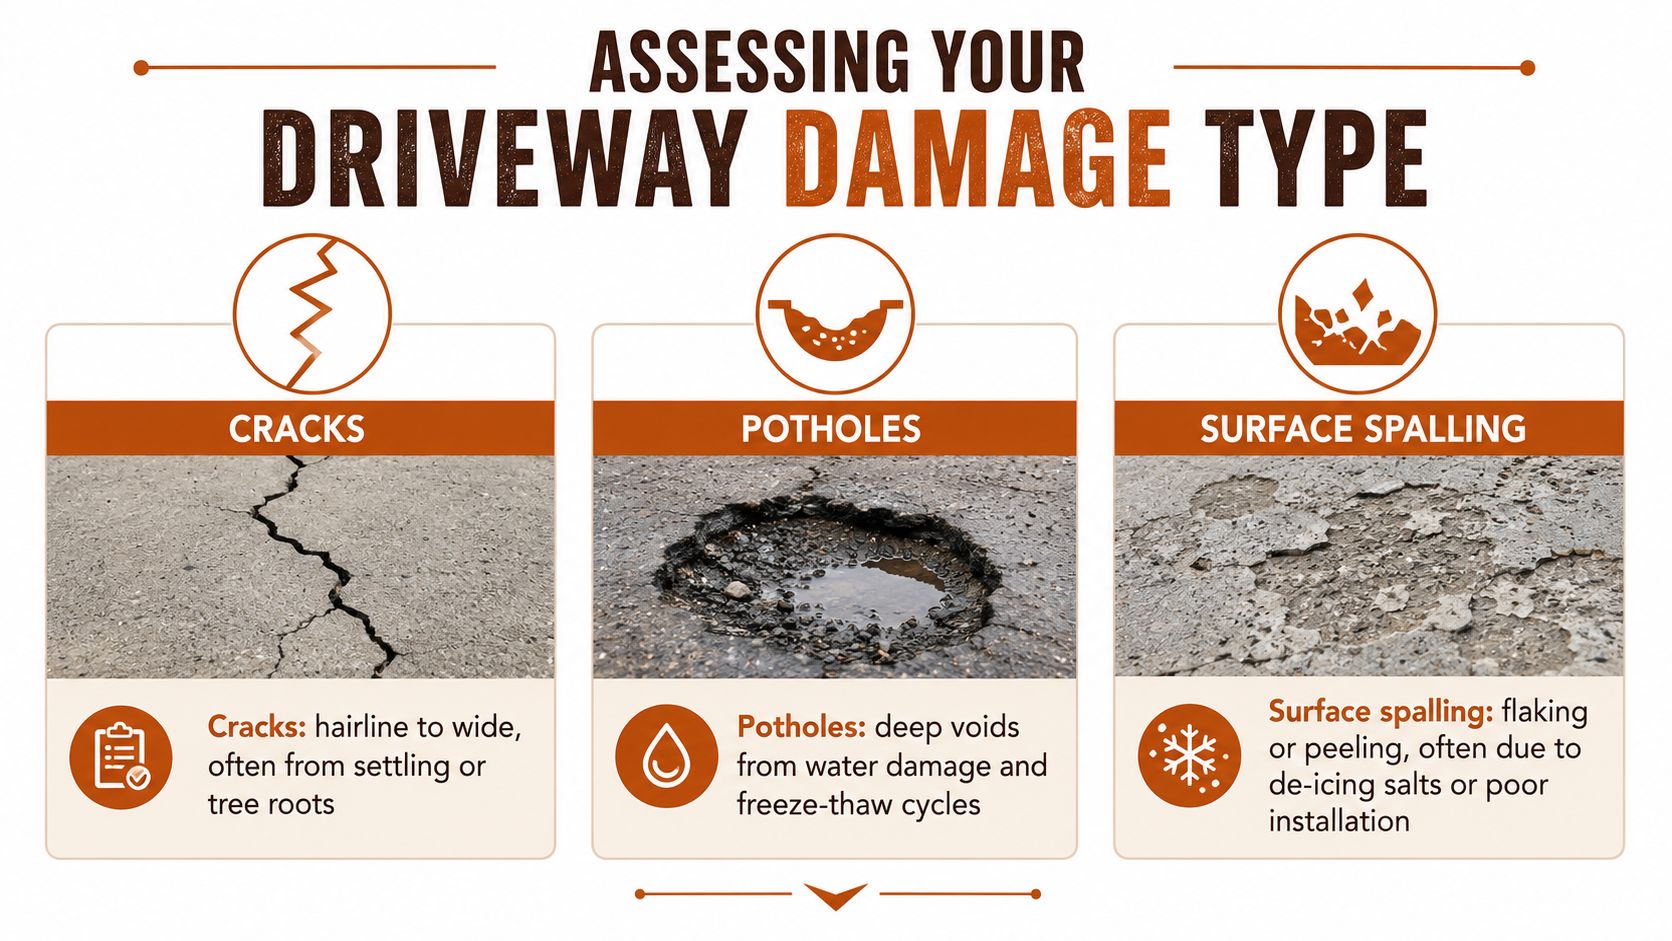
How to read the damage before you buy anything
Start with movement. If the crack changes width, the slab feels soft underfoot, or water collects in the same spot after every storm, you are no longer looking at a cosmetic issue. For concrete, small surface problems can usually be filled and sealed, but larger breaks need clean edge cutting and bonded patching, not a caulk-style fix. Rubi's concrete driveway repair guide shows the difference between surface repair and a repair that needs real prep.
Asphalt needs the same honest check. Wide cracks, repeated cracking along the same line, and potholes usually mean water has already started weakening the material below the surface. If the damage keeps returning after previous repairs, the better question is what failed underneath. For more background on the common causes, see driveway crack causes.
Practical rule: if the repair area is growing, sinking, or shedding material every time it rains, stop thinking “patch” and start thinking “cause.”
Driveway Damage Types and Severity Indicators
| Damage Type | Typical Width | DIY Repairable? | Urgency Level |
|---|---|---|---|
| Hairline crack | Very narrow | Usually yes | Low to moderate |
| Wide crack | Noticeably open | Sometimes, with the right prep | Moderate |
| Pothole | Open void | Sometimes, if shallow and isolated | High |
| Surface spalling | Flaking or peeling | Often, if localized | Moderate |
| Sunken slab or settling crack | Visible level change | Usually no | High |
That table is the cutoff I use in the field. DIY works best for stable surface damage, not for movement, settlement, or recurring failure. In plain terms, driveway repair DIY makes sense when the surface is the problem, not when the ground underneath is already losing support.
Tools and Materials You Need for DIY Repair
A driveway repair starts with the right kit, and the kit should match the surface and the failure you are fixing. Concrete jobs usually call for a stiff brush, a pressure washer, a diamond-blade saw for larger breaks, a trowel, and a bonding agent. Asphalt work leans toward a caulk gun, putty knife, tamper, squeegee, and sealcoat tools.
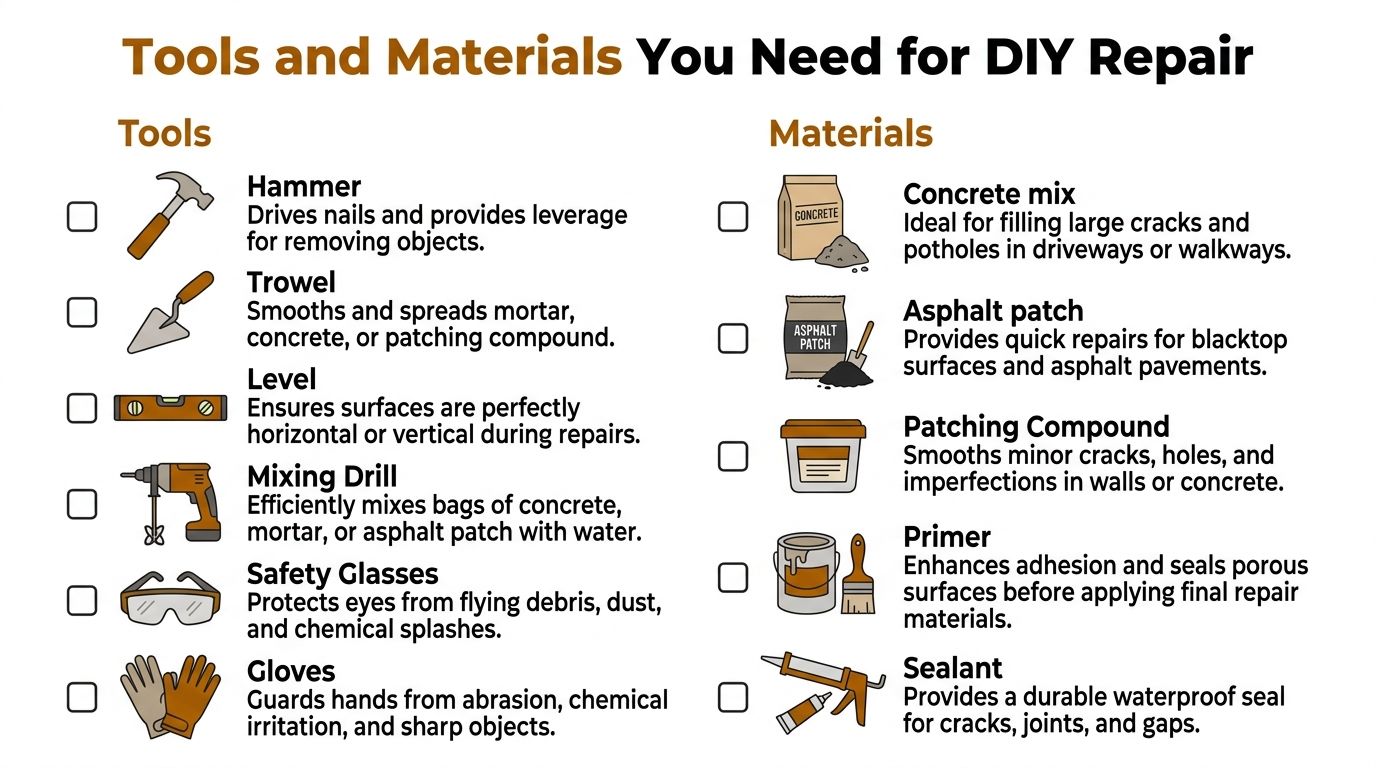
What to keep in the truck or garage
Keep the basics together before you start. A practical kit includes:
- Safety glasses and gloves, because dust, chips, and filler splatter are part of the job.
- Wire brush or stiff broom, because loose debris is the fastest way to make a patch fail.
- Pressure washer or hose with high-pressure nozzle, because clean pores and edges bond better than dirty ones.
- Trowel and putty knife, because you need to press material into the repair, not just lay it on top.
- Rapid-set patch mix or crack filler, chosen for the surface you're repairing.
- Bonding agent or primer, because cured concrete and fresh patch don't naturally stick well.
- Sealant, because water infiltration is what keeps reopening the same damage.
Material choice matters more than the store brand. A filler that fits the depth, width, and substrate will hold up better than a stronger product used the wrong way. For a local reference on concrete mix selection, Riverside Sealing & Striping, LLC discusses driveway mix choices in its guide on the best concrete mix for driveways.
Good material choice beats fast application. Pick a product that matches the damage, the repair will last longer and waste less money.
For asphalt potholes and depressions, staged filling works better than dumping material in one pass. Start with crack filler, then use fine sand or depression filler for low areas, and finish with sealcoating when the surface is ready. That approach helps the repair stay flush instead of sinking back down.
Step-by-Step Repair Procedures for Common Issues
A driveway repair only works if the fix matches the failure. A hairline crack, a broken edge, and a sinking spot need different steps, and a bad match usually wastes material and time. In Central Florida, heat, humidity, and sudden rain make rushed repairs fail faster because the bond never gets a fair chance to set.
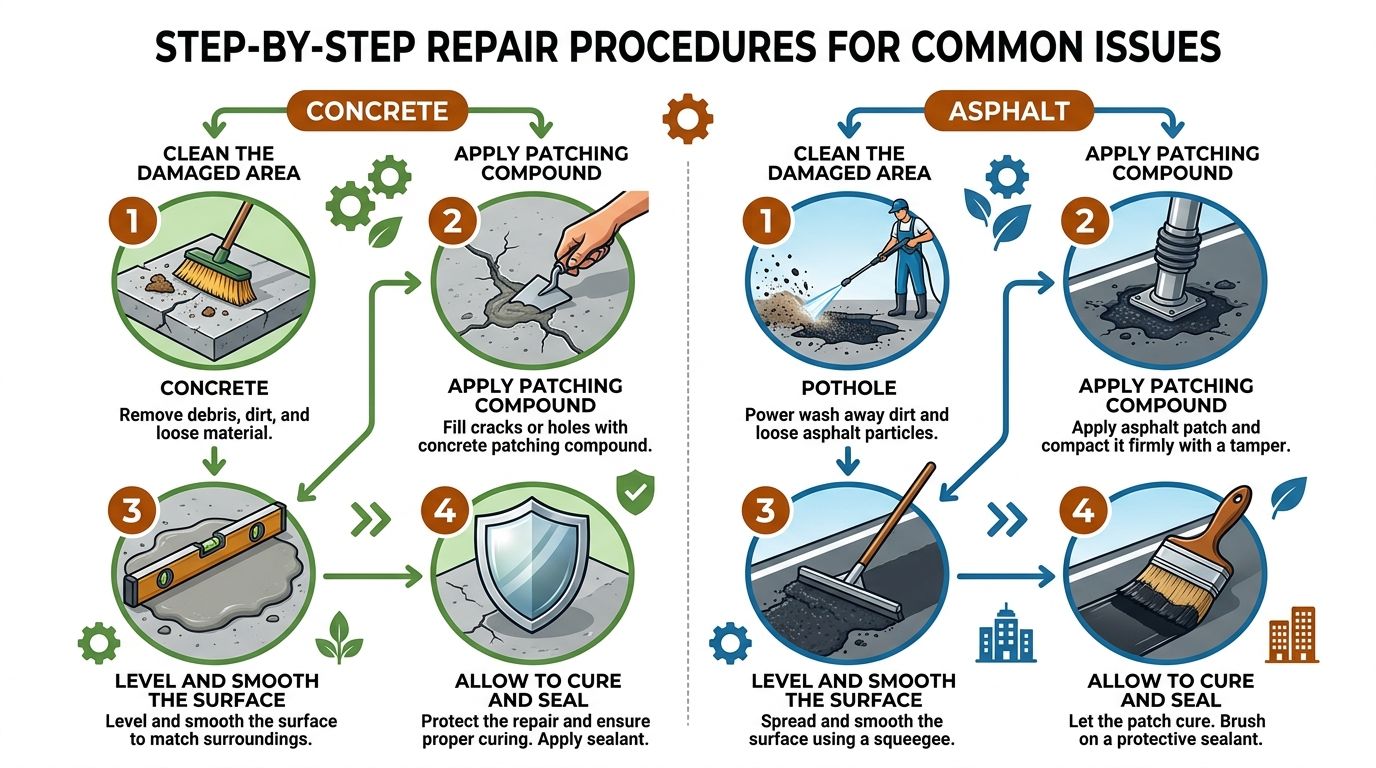
Concrete repairs that hold up better
Small concrete cracks need a clean, dry path before filler goes in. Remove loose material, brush out dust, and clear the edges so the repair bonds to solid concrete instead of crumbly residue. If the break is wider or the edge is broken, cut it back to a straight, sound line with a diamond-blade saw before you patch it. That kind of prep is what separates a temporary smear from a repair that stays in place.
Once the area is ready, wash it, let it dry, and apply the bonding agent if the product calls for one. Set the rapid-set patch mix into the opening, then pack it firmly so there are no voids under the surface. A patch with air pockets or a proud edge usually chips sooner because tires catch the weak spot first. Finish with a broom texture while the mix is still workable so the repair blends better and gives the tire some grip.
For deeper breaks, surface filler alone is the wrong fix. If the concrete is moving, sinking, or broken through the base, patching the top just hides the problem for a while. That is the point where a homeowner should stop treating it like a surface flaw and decide whether the slab needs more than DIY work.
Asphalt repairs that stop water intrusion
Asphalt repairs start the same way, with clean, dry material and no loose debris left behind. Sweep or pressure-wash the area, pull weeds, and remove gravel or broken asphalt around the damaged spot. If the surface is damp, wait. Asphalt filler and sealcoat both suffer when moisture gets trapped underneath.
Narrow cracks can be filled directly with a caulkable crack filler. Potholes and deeper depressions need a staged fill, starting with a base of fine sand or similar material to bring the void up near the surface, then using depression filler to level the repair flush. That step-by-step build keeps the patch from sinking back down after the first traffic load. When the base is hollow, the top layer may look fine at first and still fail quickly.
Sealcoating comes after the repair has cured and the surface is ready for it. Use a squeegee, roller, or broom to spread it evenly in workable sections so the coating does not puddle on top. A thin, even application protects better than a heavy one that skins over and peels. If the asphalt is raveling, flexing, or breaking apart over a wide area, sealcoat will not turn it into a sound surface.
Keep this in mind: a repair that needs constant forcing usually needed better prep, not more product.
For cure timing, the product directions matter more than a generic rule. Some driveway repair guidance puts traffic return for crack repairs in the 24 to 36 hours range and asphalt sealcoat in the 24 to 48 hours range, depending on the product and weather (VFPaving DIY driveway repair steps). HGTV also notes that asphalt sealcoats may need 24 hours before walking and 48 to 72 hours before driving (HGTV driveway repair and reseal guide).
Common mistakes that shorten the repair
Poor prep is still the main reason DIY repairs fail. Dust, moisture, and crumbling edges keep the patch from biting into the surface, which is why some repair methods call for wire-brushing, pressure-washing, and slight overfill to account for shrinkage as the material cures. If the edges are weak or the base is already moving, the repair may look good for a short time and still break apart under normal use.
Concrete repairs can also benefit from shaping the crack so it is wider at the top than the bottom, then using latex bonding glue before the fill goes in. That creates a better mechanical hold than smearing material over the opening. For homeowners, the trade-off is simple. A careful prep job takes more time, but it saves money by reducing the chance that you will have to redo the same spot after the next heavy rain or hot stretch.
Sealing and Finishing Your Repair
The patch is only half the job. Sealing keeps water out of the repair, and water is what keeps reopening concrete and asphalt in Central Florida. Many homeowners treat sealer like optional cleanup, but it is the layer that protects the repair after the first hard rain. If the surface is already moving, sealing only hides the problem for a while. It does not stop it.
Finish the surface so it blends and drains
Concrete patches should be broom-textured while they are still workable, then sealed after full curing. That texture helps the patch match the rest of the driveway and gives tires traction when the surface gets wet. Asphalt sealcoat should be applied in manageable sections with a squeegee, roller, or broom so the surface can absorb the sealer instead of letting it sit in low spots.
For concrete, wait until the repair has cured fully before sealer goes on. If you need a practical reference for curing time, Riverside Sealing & Striping's concrete cure guide lays out the basics homeowners need to check before sealing. For asphalt, the sealer needs the right temperature and a dry weather window so it can bond properly. A thin, even coat usually holds up better than a heavy one that skins over on top and leaves soft spots underneath.
Best practice: seal the repair as protection, not as camouflage. If the patch still moves or sinks, sealer will not save it.
Why sealing matters in Florida
UV exposure breaks down asphalt over time, and moisture keeps finding weak points in both materials. A sealed repair handles that cycle better than an exposed one, especially when summer storms and hot afternoons keep stressing the surface. Rona's asphalt guidance also treats crack filling and resealing as the steps that help block repeat damage, which is the right mindset for Florida driveways.
Concrete gets the same benefit when the sealer is chosen and applied correctly. The goal is not a glossy finish. It is to slow water intrusion and reduce the chance that one small repair turns into a larger one next season.
Central Florida Weather and Timing Considerations
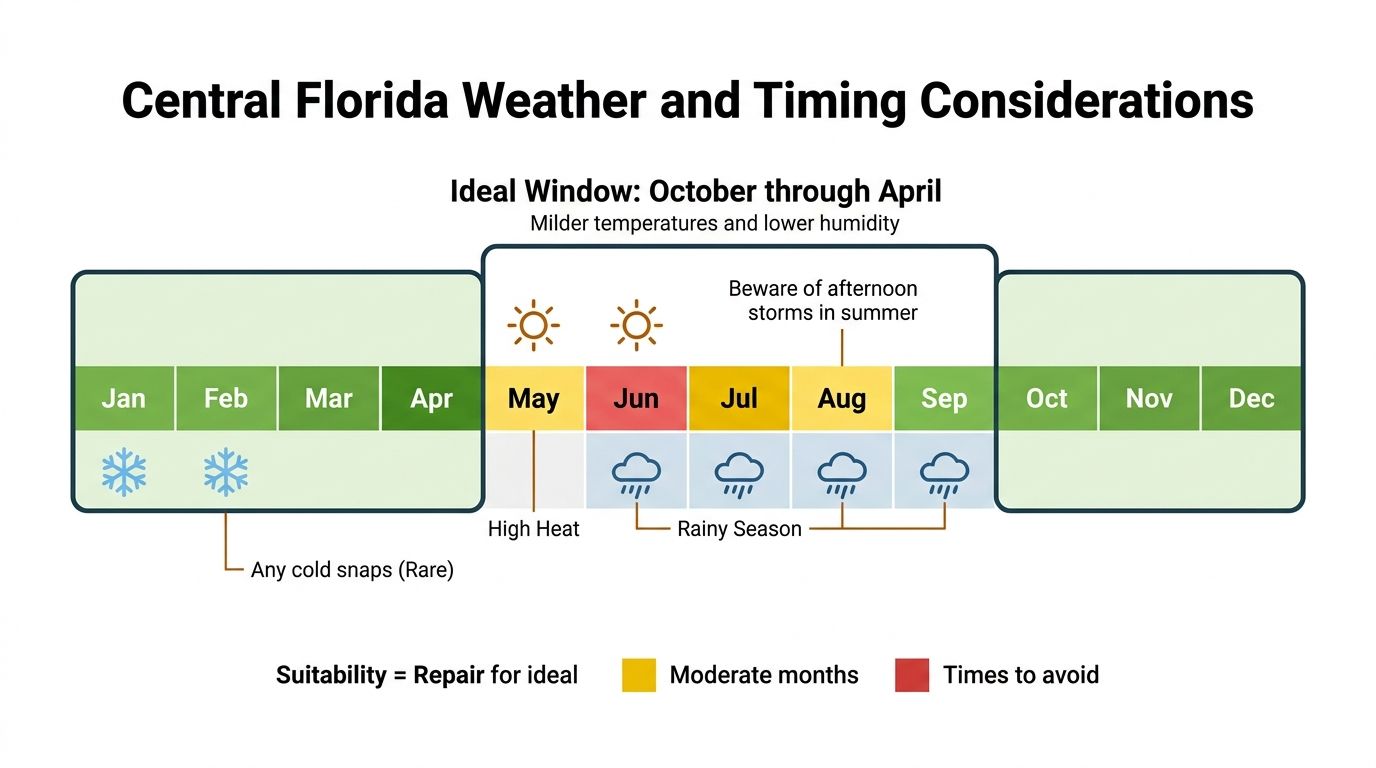
A driveway repair can look fine when you finish it and still fail before the day is over if the weather turns. In Central Florida, morning dew, afternoon thunderstorms, and high humidity all slow drying and weaken bonding. That matters in Marion County, FL and Citrus County, FL, because a patch that seems set at lunch can be soft again by evening.
When the weather helps and when it hurts
Dry conditions give repair material the best chance to bond and cure. The surface needs to stay dry long enough for the patch to take hold, and cure times will still change with the product and the weather. That is why a repair window that looks workable on a warm afternoon can still go bad if humidity stays high or rain rolls in later.
Asphalt crack repair and sealcoating both need a clean weather window. Some products return to traffic in about 24 to 36 hours, while asphalt sealcoats may need 24 to 48 hours, depending on the product and conditions. If storms are in the forecast, wait. A rushed repair in wet weather usually costs more later because the material never gets a fair cure.
Heat and moisture change the schedule
Hot pavement can skin over too fast, which makes it harder to work patch material deep into the void. Moisture creates the opposite problem. It weakens bond strength and keeps sealers from setting cleanly. That is why the milder part of the year is usually the easier time to handle driveway repair DIY work in Central Florida.
Concrete deserves extra patience. Before you seal or put a repaired area back into regular use, check a practical guide on how long concrete takes to cure. A surface that feels firm too soon can still be vulnerable underneath, and sealing early can trap problems instead of fixing them.
When to Call a Professional and Maintain Your Driveway
DIY makes sense for stable surface damage, but not for a driveway that's moving. If the same crack keeps opening, a slab has sunk, or water is pooling in the same spot after every rain, patching is only treating the symptom. In Ocala, Dunnellon, and nearby Central Florida communities, those signs often point to base issues, drainage problems, or joint movement that surface material can't correct.
Signs the smarter move is professional repair
- Recurring cracks in the same line, because the failure is probably below the surface.
- Sunken areas or tilting slabs, because patching over settlement doesn't restore support.
- Widespread crumbling or multiple repaired spots, because the driveway is beyond a simple fix.
- Drainage that sends water back across the drive, because water is going to keep attacking the same weak point.
That's where a contractor with concrete and asphalt experience can save money over time. Professional concrete driveway repair averages $1,802 nationally and ranges from $829 to $2,830, while full replacement averages about $6,400. DIY crack-filling materials run about $20 to $50 for a typical driveway and usually take 1 to 2 hours, which is why DIY makes sense for small surface defects, not for sunken slabs, widespread cracking, or base failure (Estimate Concrete driveway repair guide).
A licensed and insured local contractor can also spot the cutoff point faster. Riverside Sealing & Striping, LLC handles concrete driveway removal and replacement, new concrete driveways, and asphalt maintenance, so if a repair has crossed from surface damage into structural failure, you're not guessing your way through it twice. One option is a no-pressure evaluation that tells you whether a patch, replacement, or maintenance plan makes the most sense.
Maintenance that keeps repairs from coming back
Keep water moving away from the driveway. Check for standing water after heavy rain, because that's usually the first clue that drainage or grade needs attention. Inspect cracks early, before they widen and let more moisture in, and seal exposed surfaces before small defects become larger repairs.
If you're in Marion County, FL or Citrus County, FL and you're unsure whether your driveway still qualifies for a DIY fix, that's the point where a professional look is worth it. The cost of one wrong repair is usually more than the cost of getting the diagnosis right.
If your driveway is cracking, sinking, or shedding material and you want a straight answer before you spend money on the wrong fix, contact Riverside Sealing & Striping, LLC for a free, no-pressure estimate. They handle concrete driveway replacement, new driveway installation, asphalt sealcoating, and repair work across Marion County and Citrus County, and they can tell you whether your driveway is a DIY candidate or needs a professional solution.